Have you heard of LuLaRoe? I was introduced to their crazy-comfortable leggings a few months ago, and quickly became obsessed. Then a few weeks ago they released a limited edition 4th of July line, which included dresses in this to-die-for popsicle print:
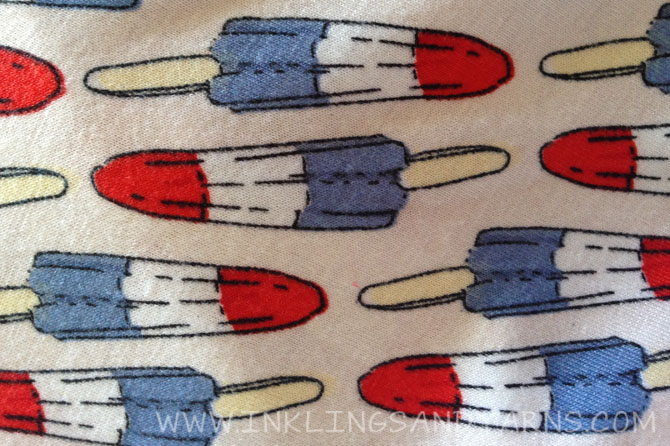
Had. To. Have.
It’s a direct sales company, so you buy through consultants on Facebook and Instagram. Or if you’re lucky enough to live near someone who sells it, there are home parties as well. I’m not a consultant or anything, I’m just someone who’s bought probably way too much from them in the last 90 days.
Anyway, back to the popsicles. The dresses started popping up last week, and were selling literally within seconds of being posted. Thanks to the help of some quick-fingered friends, I was able to snag matching ones for Allie and Me. VICTORY.
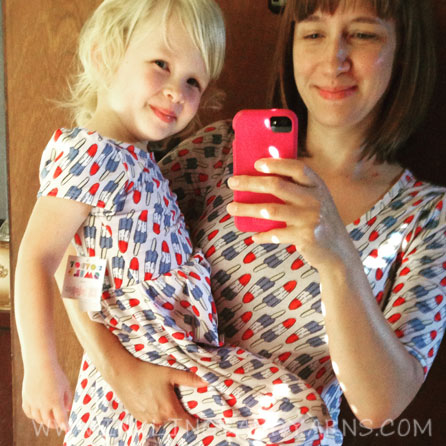
But now poor Theo was left out. I figured it wouldn’t be too hard to find him a coordinating onesie, but bomb pops are a surprisingly rare motif in baby clothes. My googling efforts revealed only a handful of expensive options. Silhouette to the rescue!
I found this cut file in about 3 seconds. At first I figured I’d cut it from fabric and appliqué it onto a onesie, but then I decided stenciling it with fabric paint would be way easier. I’m lazy.
So to make this, you need the Silhouette Stencil Vinyl, some fabric paint, a few paint brushes, and a white onesie or shirt.
You also need to make a few modifications to the cut file, so let’s start there.
When you open the cut file from your library, it will look like this:
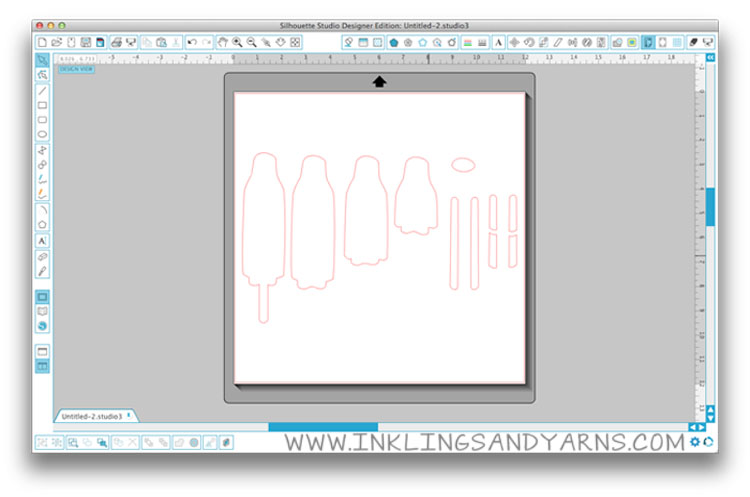
For the shirt I painted the top red portion, the bottom blue portion, and the tan popsicle stick, but left the middle white portion unpainted. So I want the stencil to reveal the top, bottom, and stick, like this:
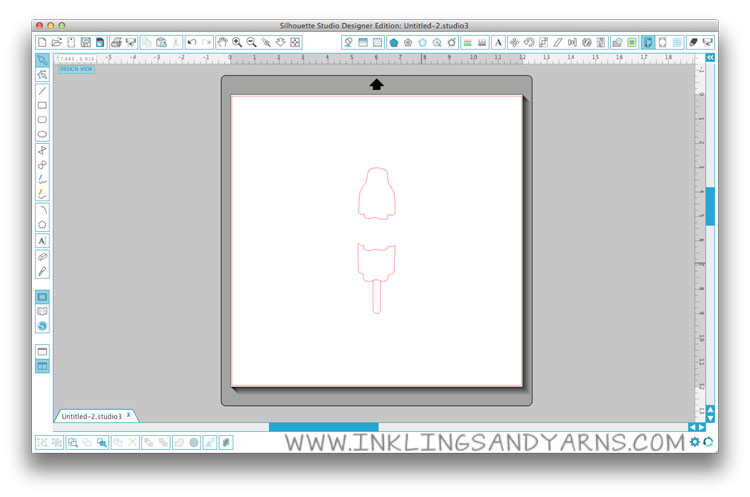
So here’s how I got there.
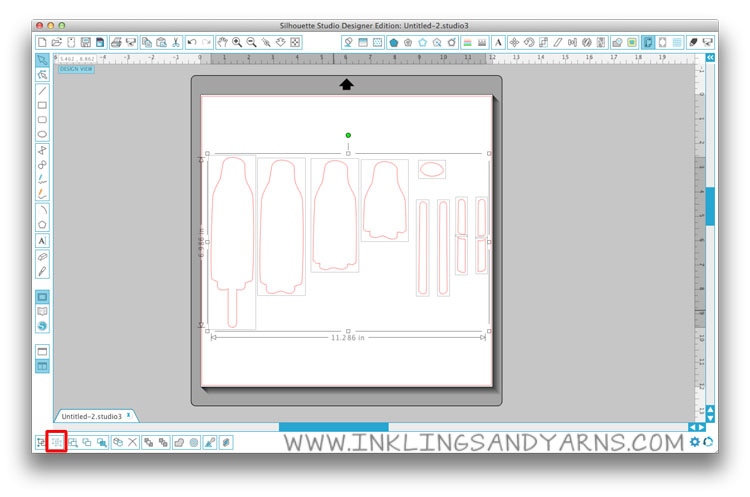
First I had to ungroup the shapes. Click on any cut line to highlight the entire area, then click the “Ungroup Selected Shape” icon, second from the left in the row at the bottom of your screen. Light gray lines should show up around each individual shape.
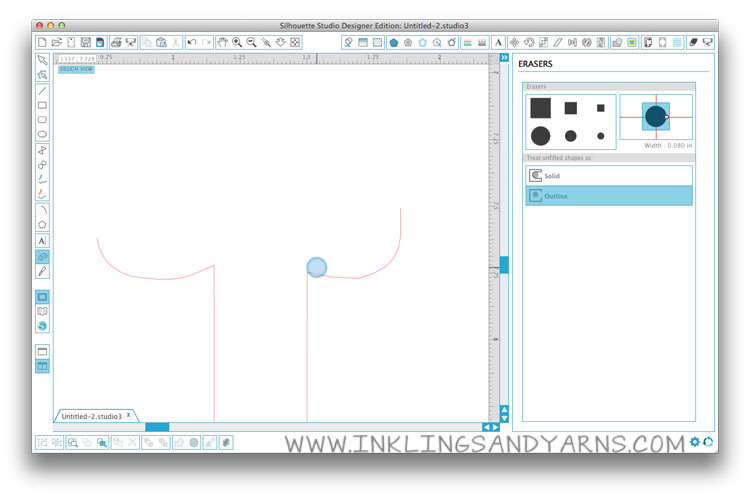
Now for the tricky part. We’re going to use the shape second from the left to build our final cut file, but will take selected lines from each of the other shapes and move them around. So first we need to get rid of the unnecessary cut lines. When you select the Eraser Tool, you’ll notice there are 2 options: Solid and Outline. For this, make sure outline is selected. You can see below that I erased most of the far left shape, leaving just the popsicle stick and a little bit above it.
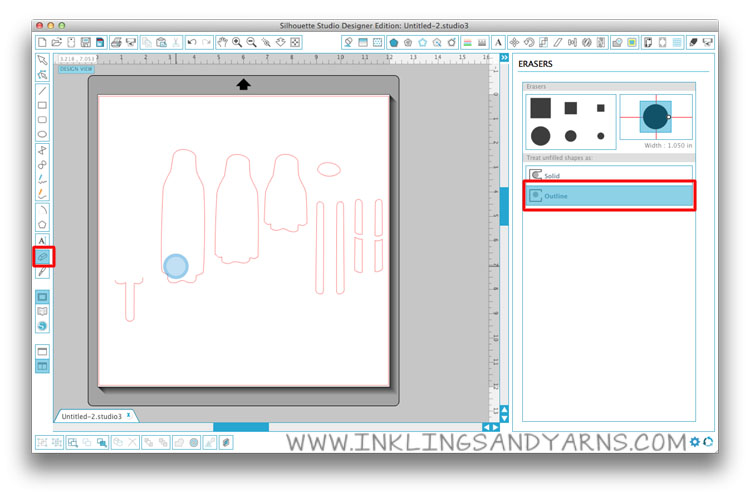
Zoom in really close to delete the last little bit, making sure not to cut the popsicle stick short or leave any scraps at the top.
Now move the popsicle stick over to the master shape. You’ll also notice here that I deleted all the accent pieces on the right. You don’t need those.
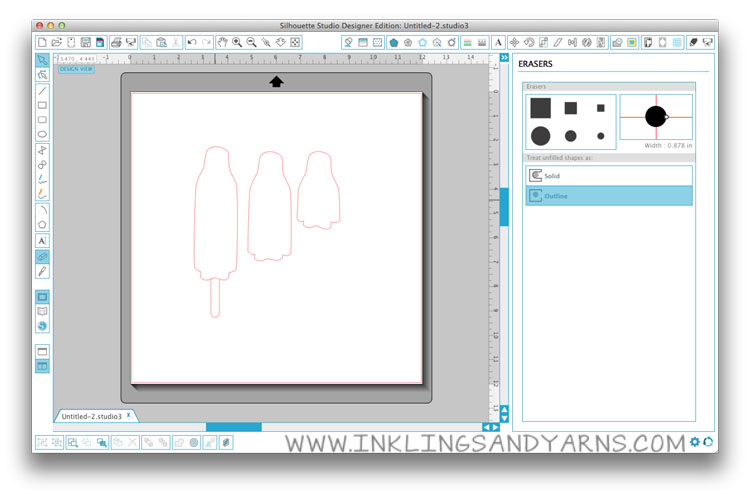
Zoom in really close again to make sure the lines just touch without overlap or gaps.
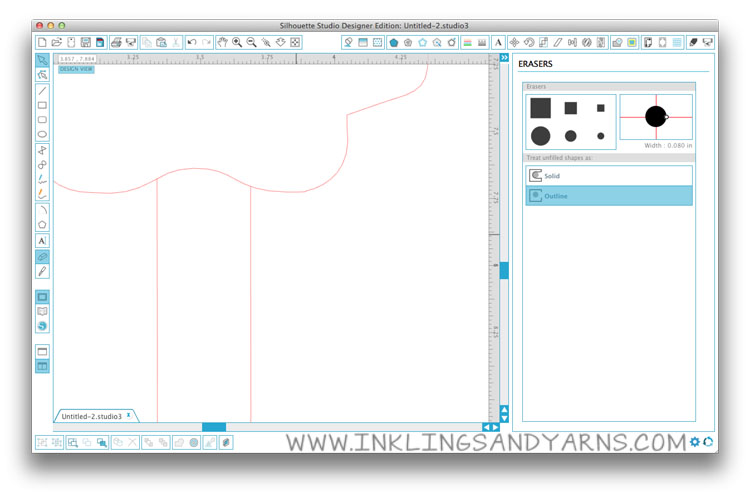
Next work on the 2/3 popsicle shape, and delete everything but the bottom line.
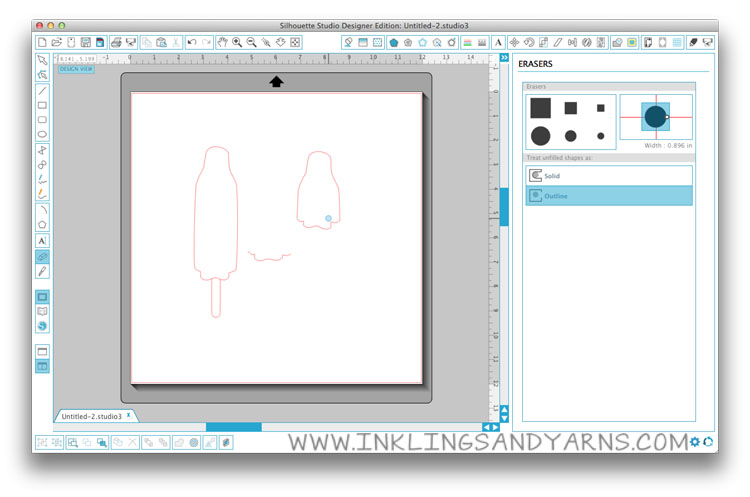
Take that line and add it to your main popsicle shape.
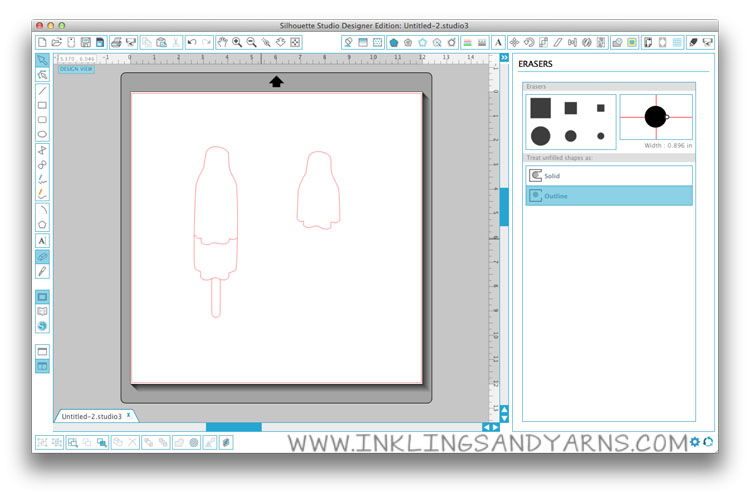
Now do the same thing with the 1/3 shape,
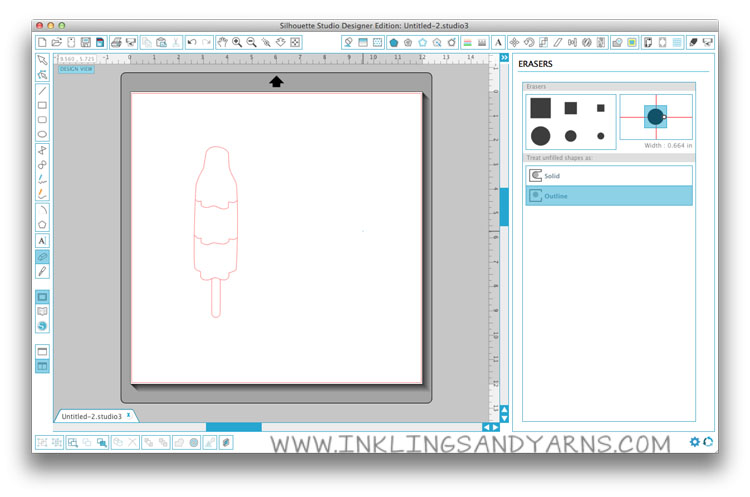 Now we’re almost there, but remember we don’t actually want to cut out the middle section, because that area’s not being painted. So erase the lines on either side of that section.
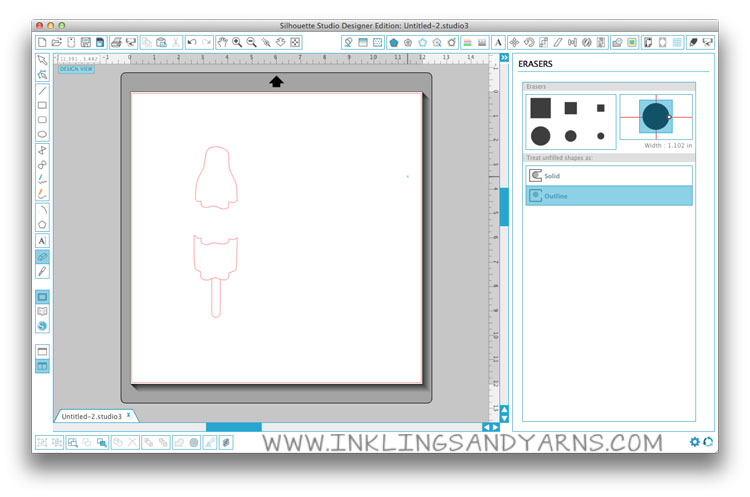
Ta Da! Now, this shape is made up of a whole bunch of unconnected cut lines, so highlight everything and hit the “Group Selected Shapes” icon on the bottom far left so you can move and size everything together.
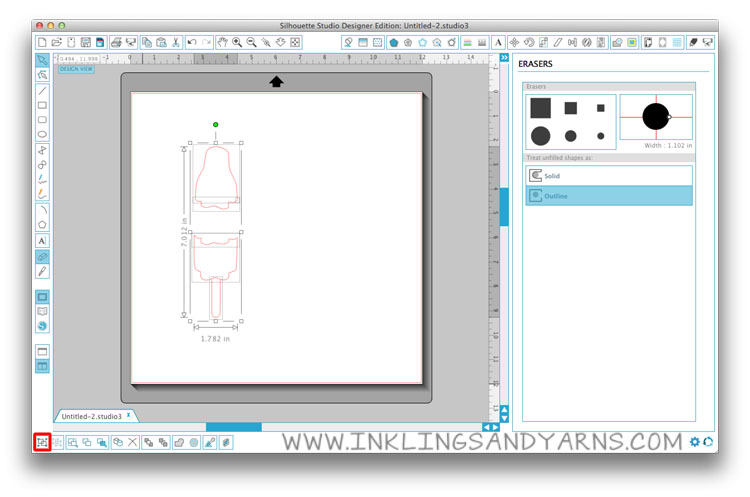
For Theo’s onesie I wanted the popsicle to be about 6 inches long, but you can make this as large as you want to fit the shirt you’re making.
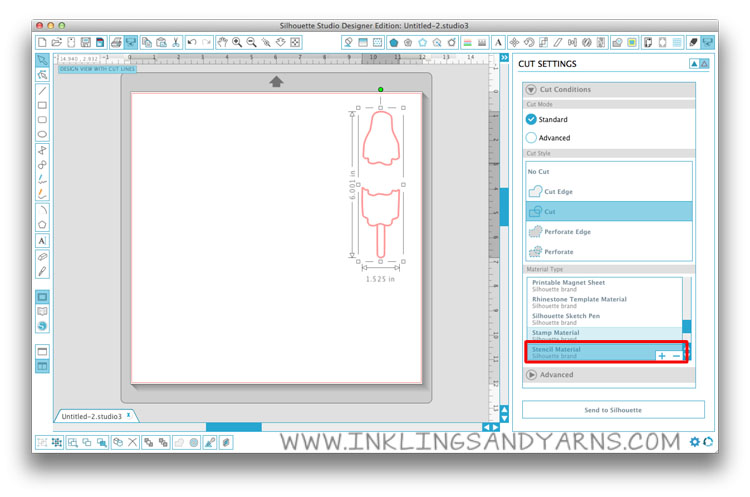
Load a piece of stencil vinyl onto your cutting mat, set your cut settings to “Stencil Material (Silhouette Brand)” and cut!
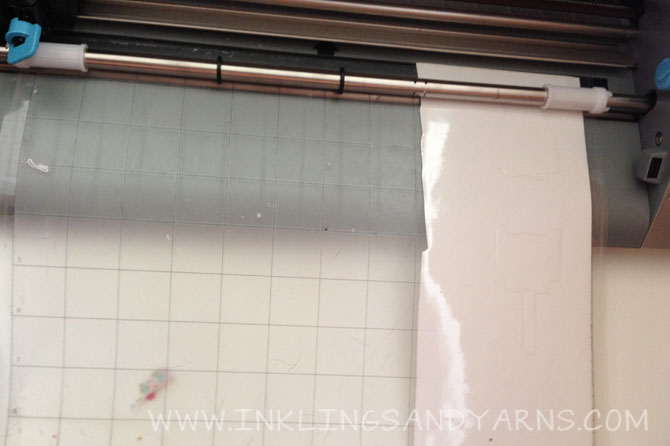
And now for the fun part!
The Silhouette stencil material is just sticky backed vinyl, so it’s pretty idiot proof. Since this shape is so simple, the transfer tape isn’t really necessary. All you have to do is peel and stick it onto your shirt. Save the little cutouts of the popsicle stick and the bottom (blue) portion, though.
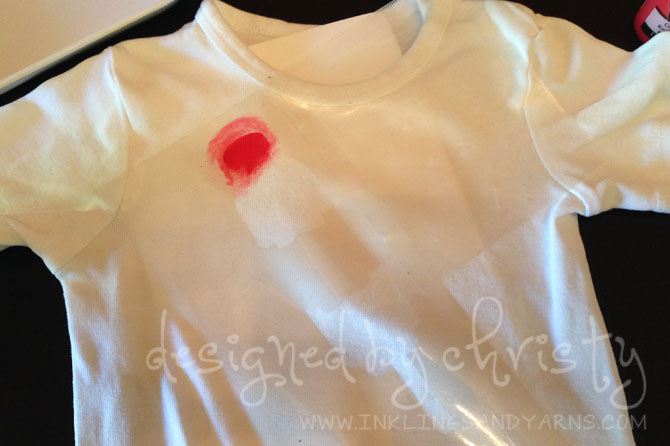
I got a little excited and started painting before I took a picture of how I’d positioned the stencil. So ignore the red for now and look at how I placed the stencil on the shirt. I didn’t leave quite enough room to the right of the cut to feel comfortable. That is something to keep in mind when you’re making stencils. I’m used to trying to minimize the amount of paper or fabric that I cut, so I position my shapes really close to the edge of the cutting pad. With stencils you want to leave a generous amount of space on all sides. Oops. To fix it I just added a square of transfer tape to protect the shirt from stray brush strokes.
Anyway, before you place the stencil, put some paper inside the shirt to prevent the paint from bleeding through, then make sure the fabric is nice and straight and flat on your table. Gently set the stencil down on top of it, and when you’re happy with the placement press it down firmly so that it sticks everywhere, especially at the edges. With knit fabric, it’s easy to end up with a crooked or warped design if you’re not careful here.
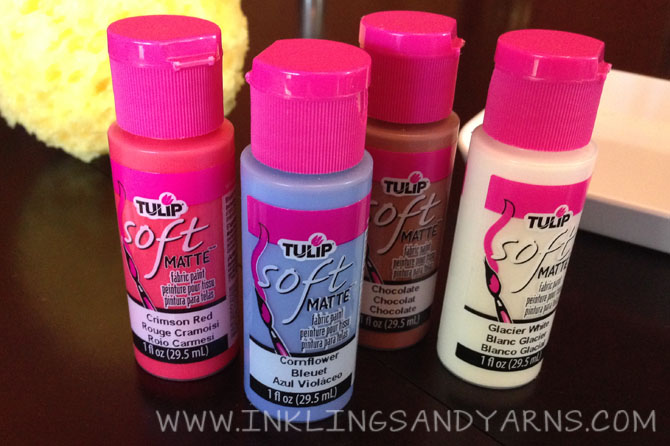
To paint, I used these Tulip fabric paints and a stiff round paint brush.
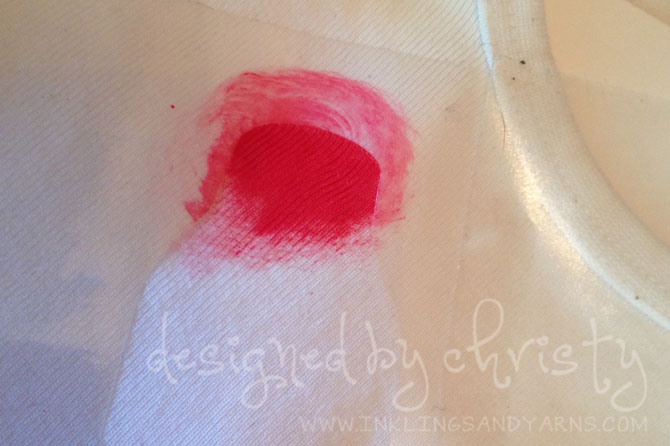
Dip the brush in the paint, and then dab most of it off, then apply the paint in little circular strokes to get even coverage. You don’t want to glob paint onto the fabric.
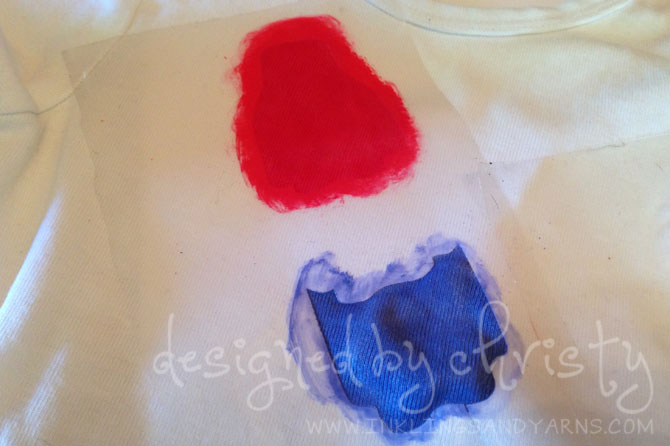
Before I painted the blue portion, I took the popsicle stick cutout and stuck it inside the stencil, so that little line between the bottom and the stick would be covered (you can see it in the picture above if you look closely).
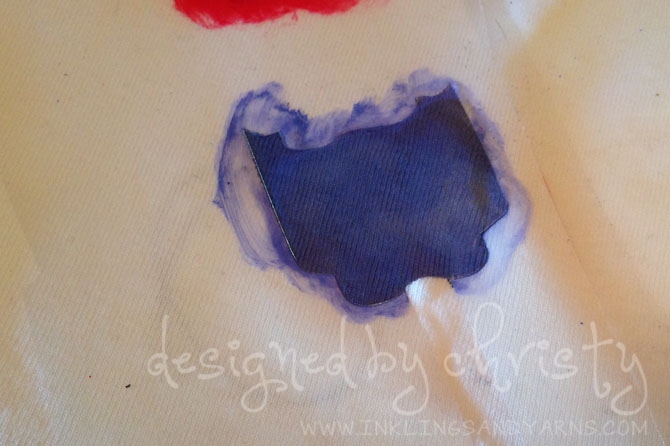
Then when I was done with the blue, I removed the popsicle stick cutout and put the bottom cutout right over the area I’d just painted (the coat of paint should be thin enough that you really don’t have to wait for it to dry between these steps).
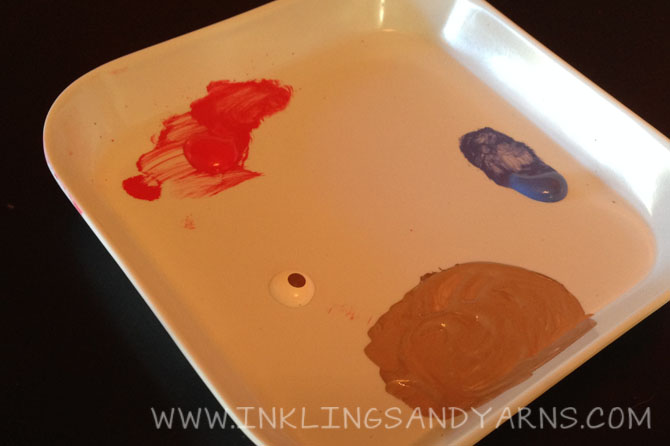
The brown paint I had was a little dark for my liking, so I tried adding some white to lighten it. When that was still too dark, I started over, this time pouring the white paint first, then adding just a tiny drop of the brown.
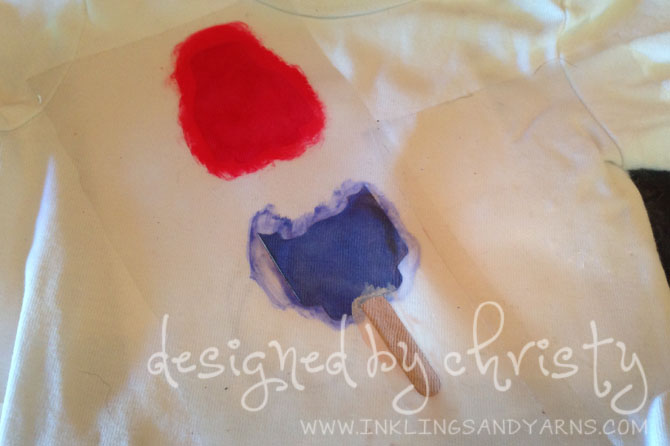
As soon as I finished all three sections I peeled the stencil away, and voila!
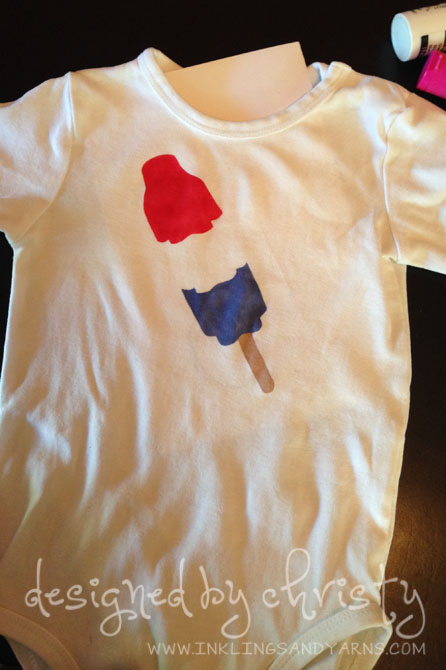
To be honest, I’d planned to add an outline and some detail with a black fabric pen, but I ended up really liking the way it turned out without it. And look how cute it looks on my kid!
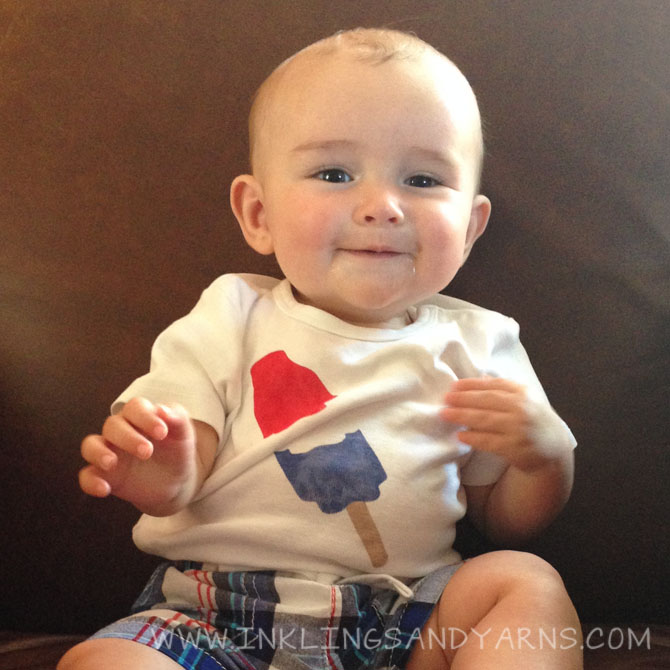
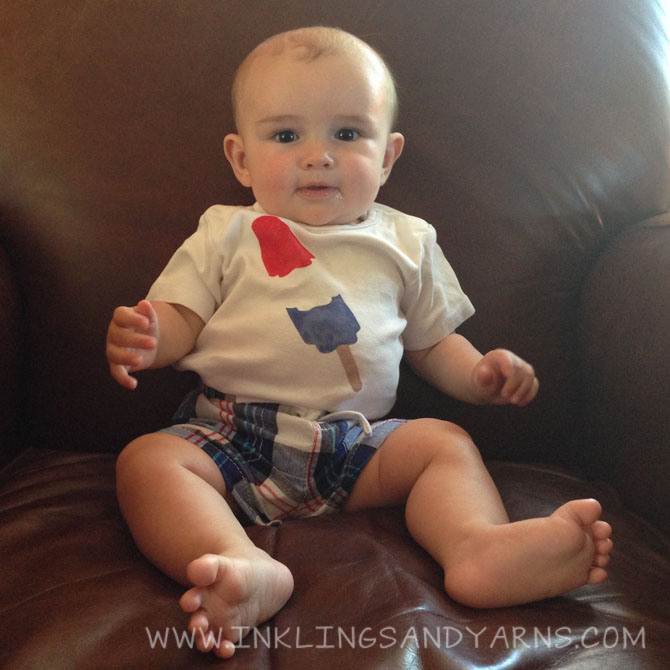
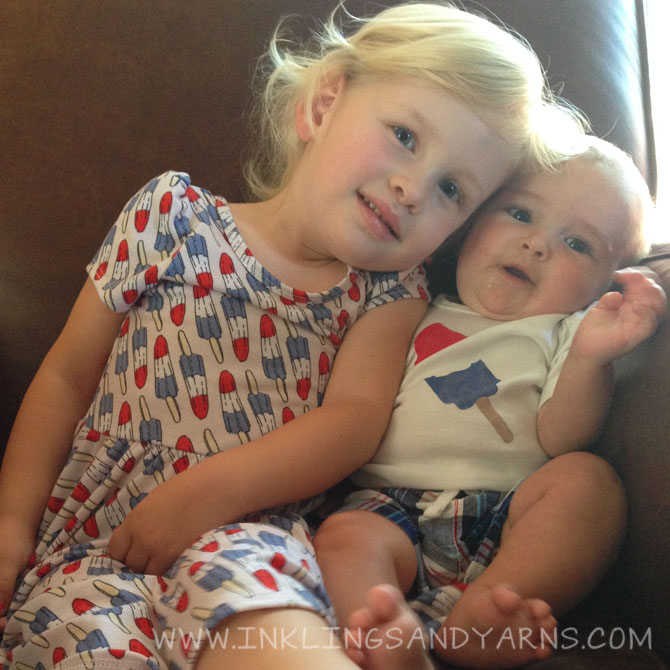
Now to talk my husband into letting me make one in his size…


Comments 3
Your passion is infectious. It’s difficult not to be thrilled about the topics you cover.
I loved this post! Your writing style is extremely engaging and your insights are very relevant. Thank you for sharing such a great post with us.
This post resonated with me on a personal level, thanks.