So you know I’m pretty new at quilting. So I’ve spent quite a lot of time in recent weeks scouring the internet for tutorials and tips. It turns out there was one tutorial that I had a particularly difficult time finding.
When I was first putting the bindings on my placemats, I saw a tutorial somewhere about how to finish the two ends so that the binding appeared continuous. Of course, when it came time to finish my ends, everything I read said to just tuck one end into the other and sew them together. But that leaves a lump and a straight seam instead of the nice smooth angled seams that I wanted.
I KNEW the instructions were out there somewhere, and I KNEW it wasn’t that hard. I just couldn’t remember how to do it on my own. Well, I finally found the instructions somewhere in the depths of the internet, and of course, by now I’ve already forgotten where it was. So I’m writing up my own tutorial so that I’ll never forget again. It really is embarrassingly simple.
So you’re almost done with your binding. You left an 8-10 inch tail at the beginning, expertly mitered all your corners, and are now back, about 10 inches from where you started.
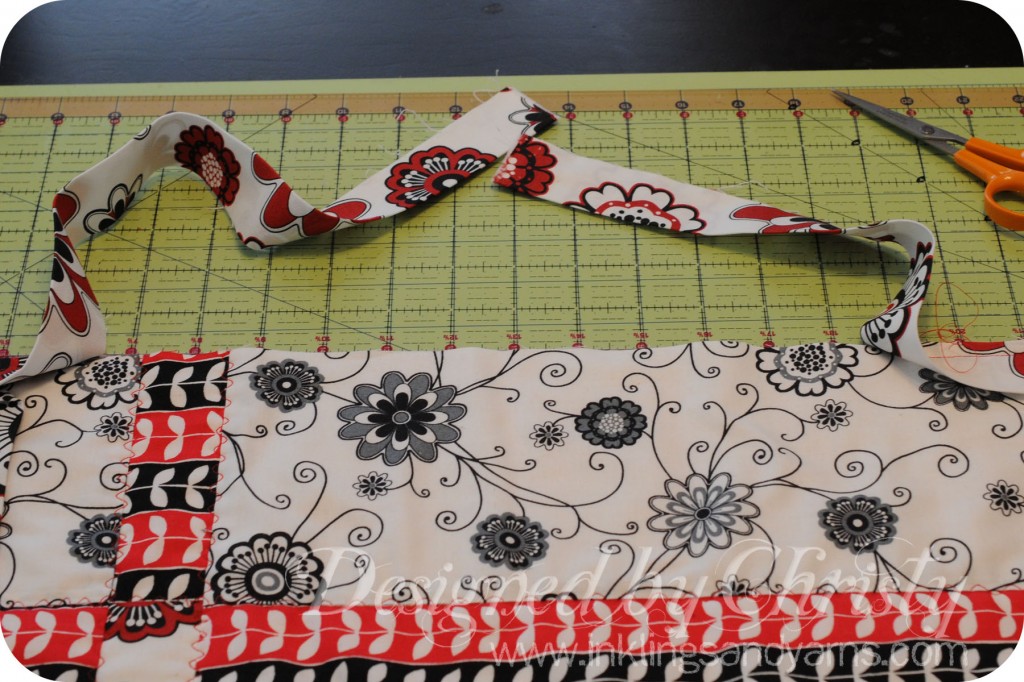
Your end tail is about the same length as your beginning tail, so they overlap by quite a bit.
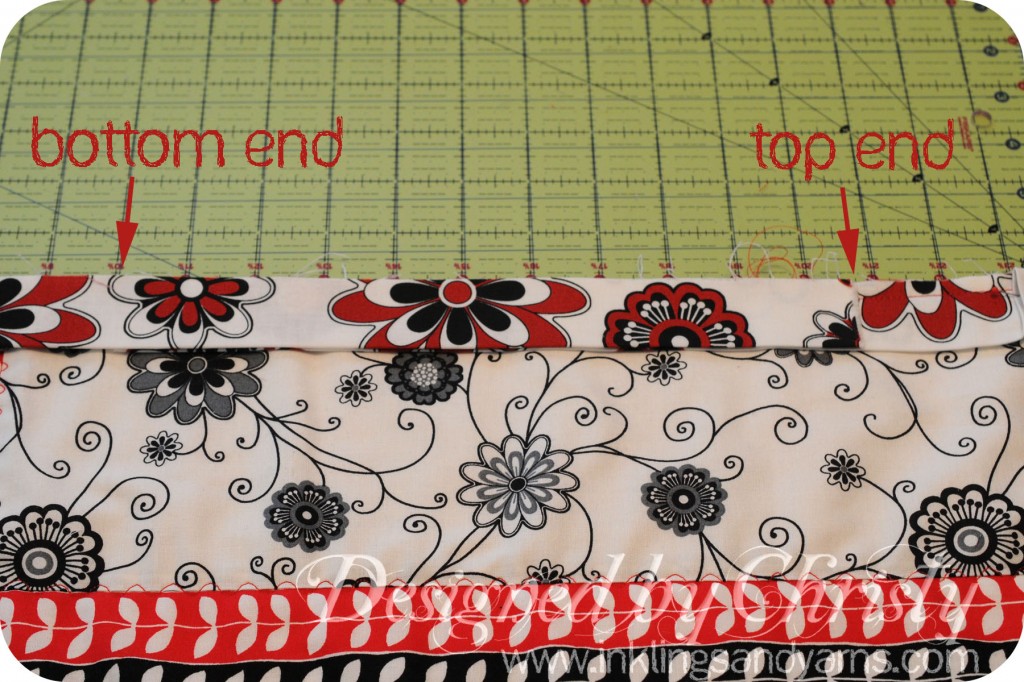
All you have to do is clip the two ends so that the distance they overlap is the same as the full width of your binding strip.
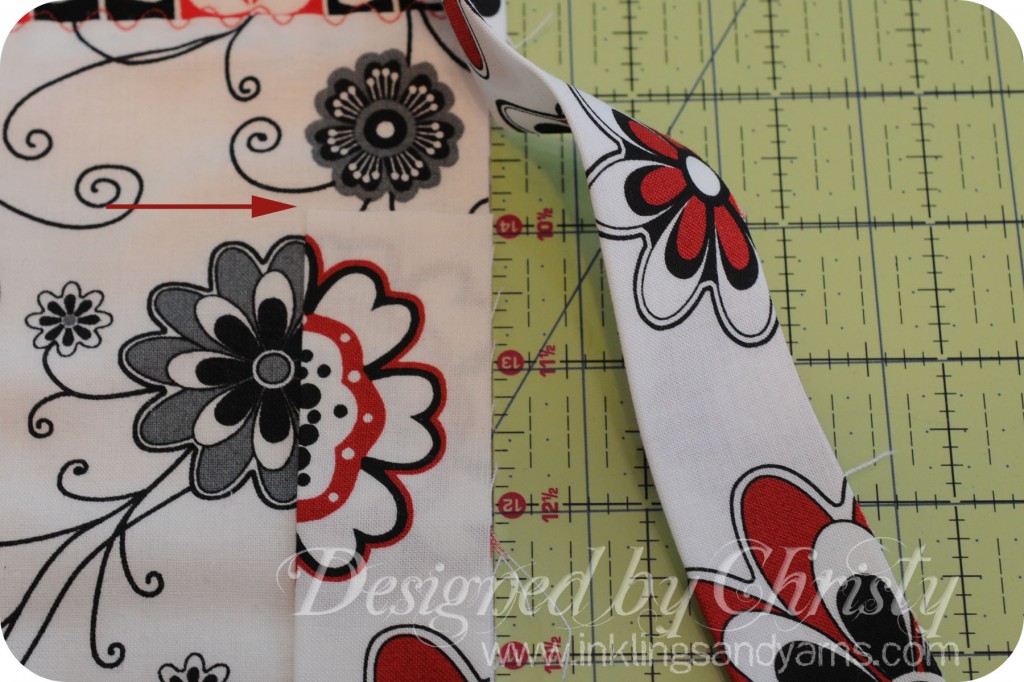
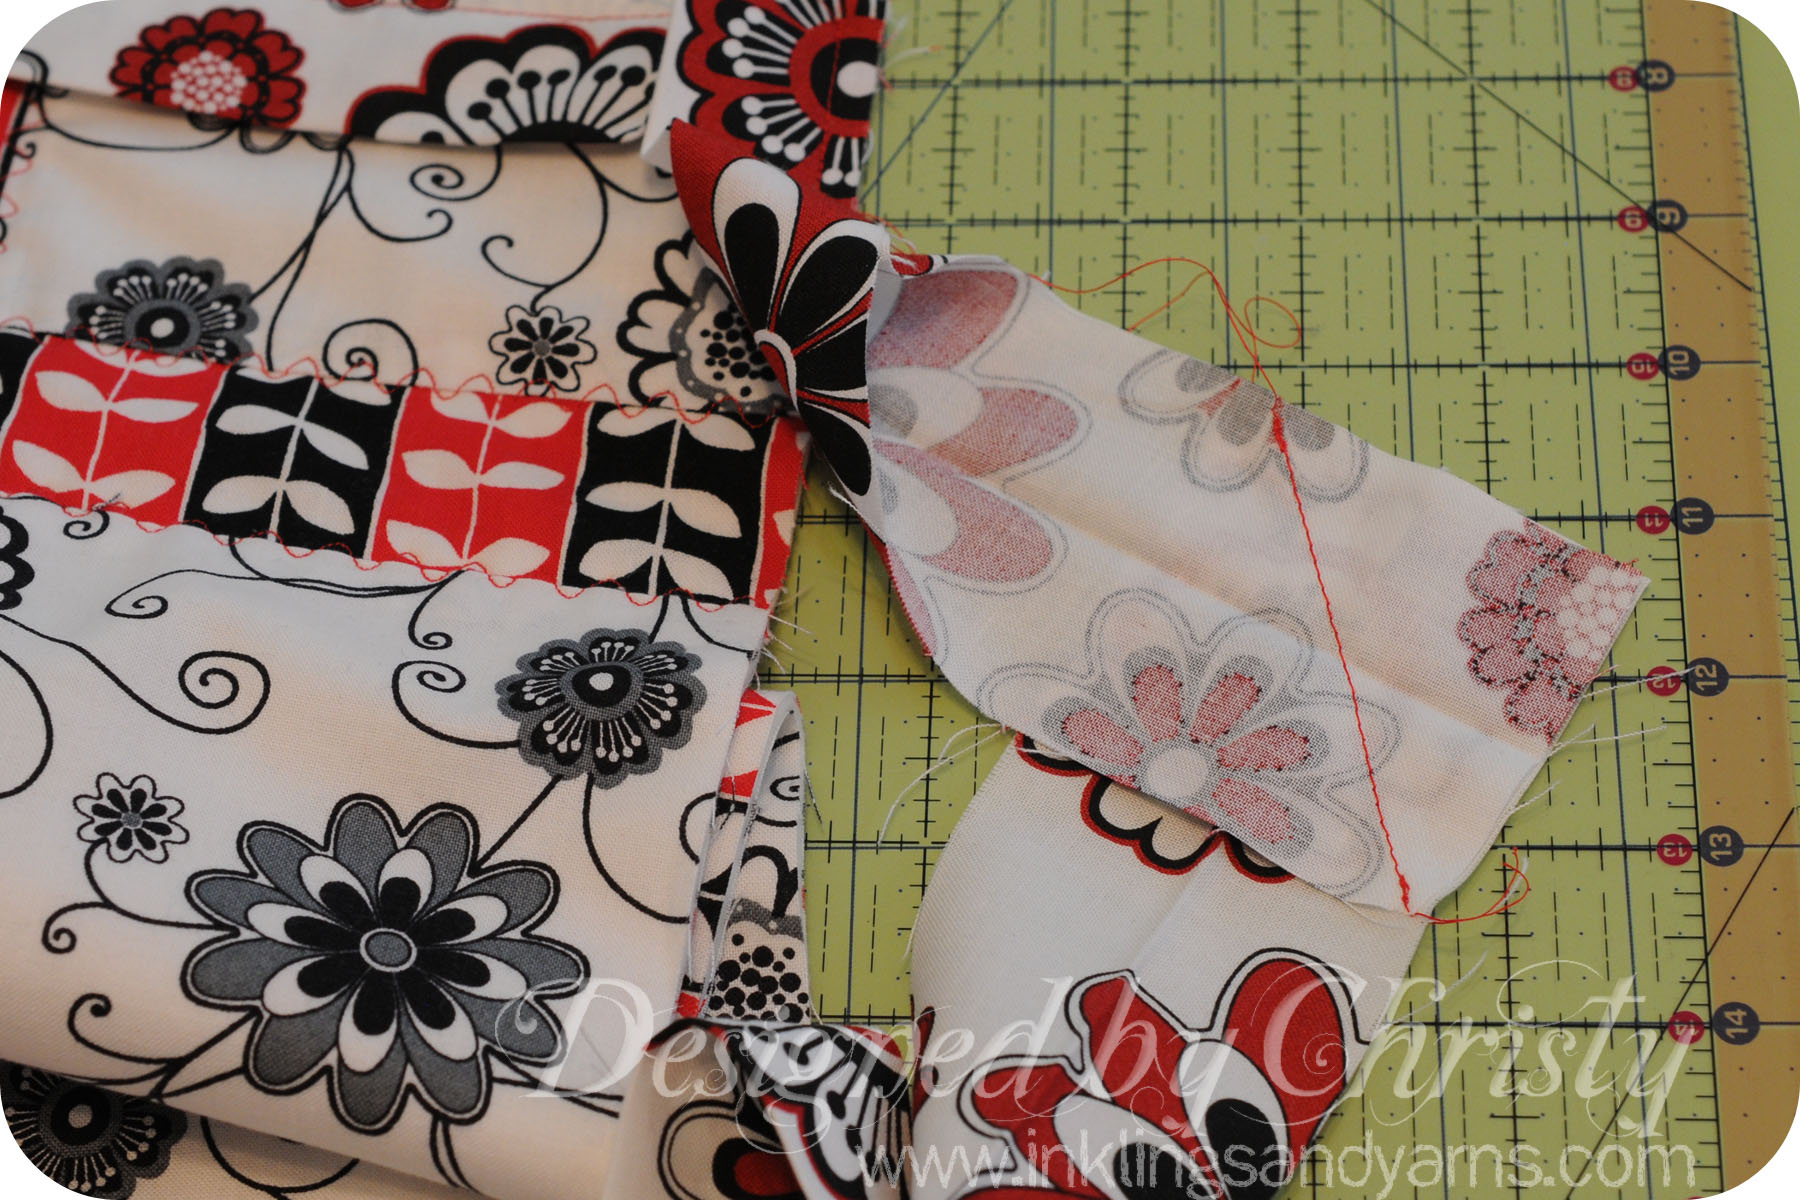
My binding strip is 2.5 inches wide, so I lined the edge of my quilt up with a ruler and picked a spot for the seam. As you see above I clipped the first end at the 14 inch mark.
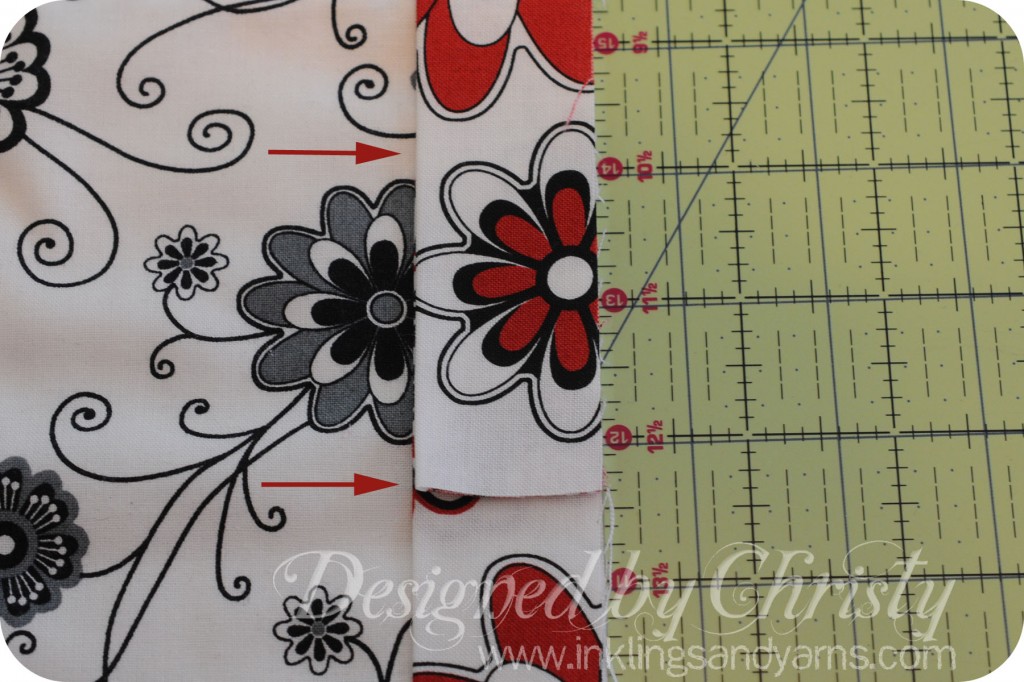
Then I clipped the other end at the 11.5 inch mark. So they overlap by exactly 2.5 inches.
Now is where it gets (slightly) tricky(er), and where you’ll be glad you left a nice wide gap between the two ends. You want to gather the quilt together and yank those two ends out. Unfold them and pin them right-sides together at right angles.
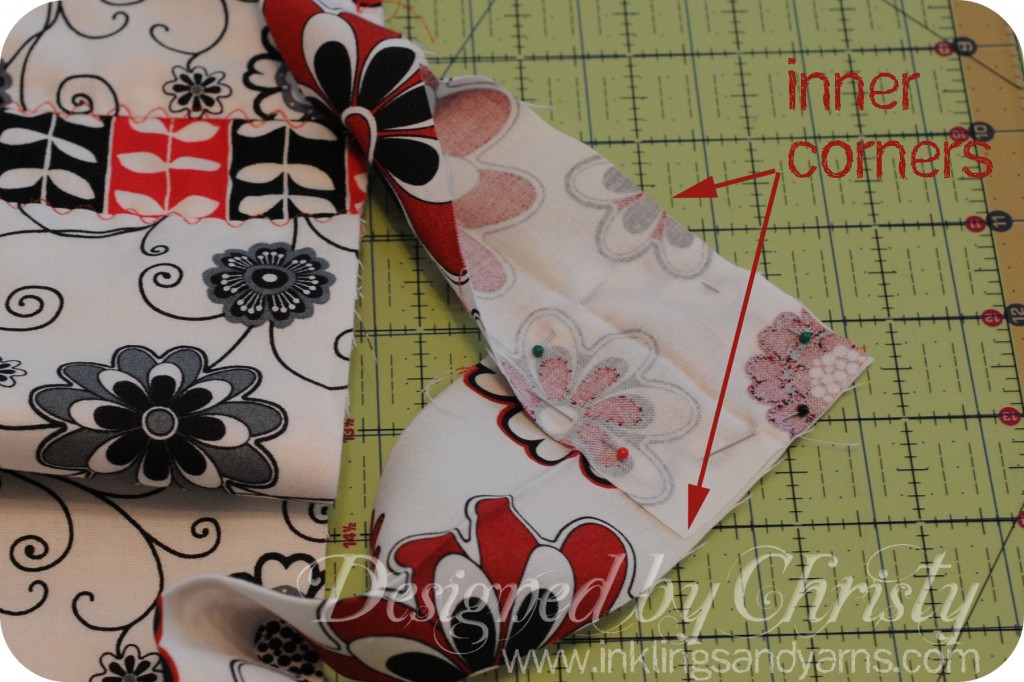
Then sew a straight line between the two inner corners (marked above).
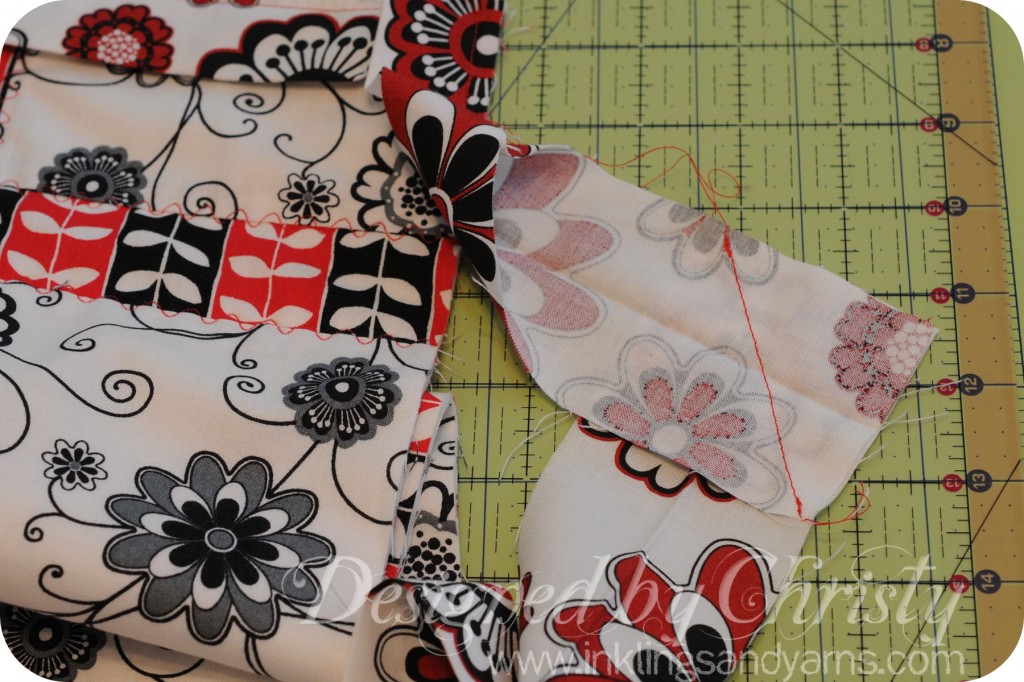
And then clip off that unnecessary corner.
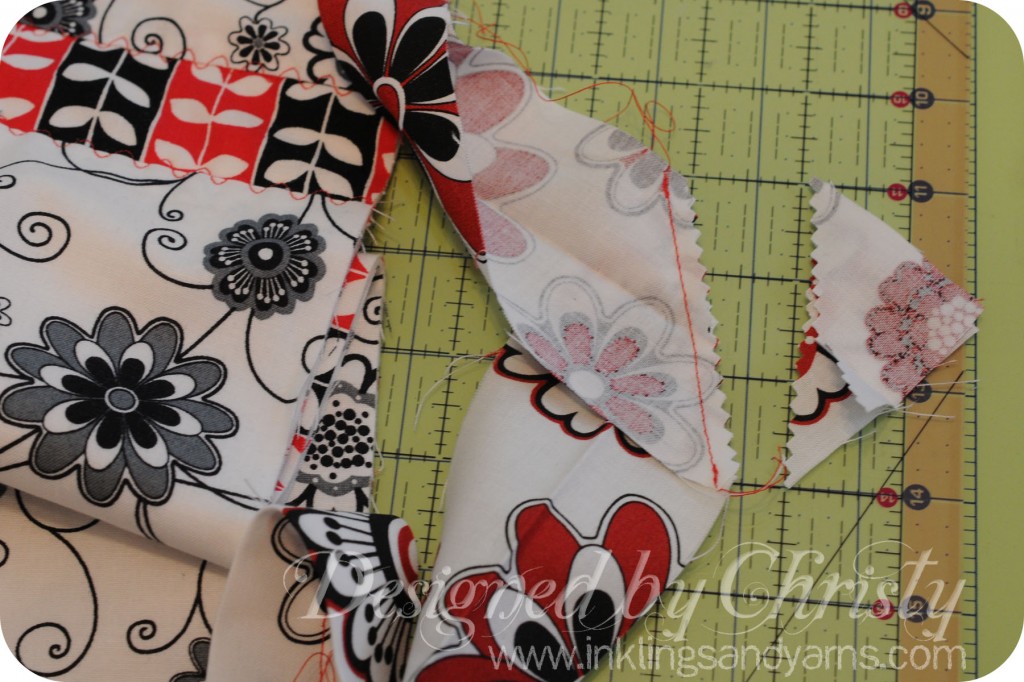
And now, flatten your quilt back out, re-fold the binding, press, and voila!
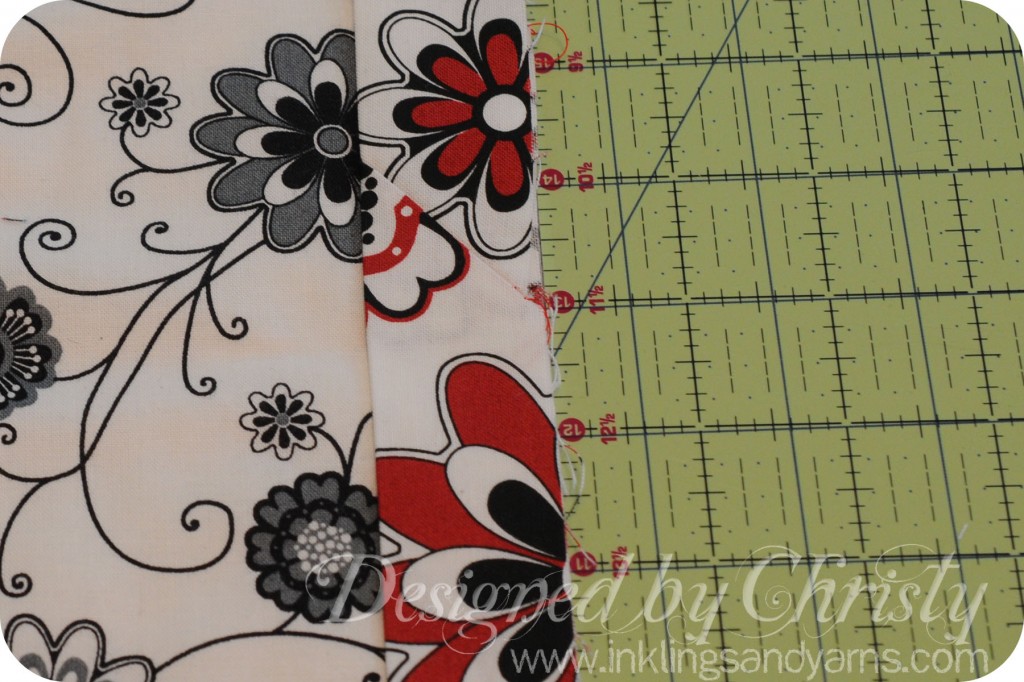
Perfect seam, perfect length, perfect everything! All that’s left is to sew down that last bit.
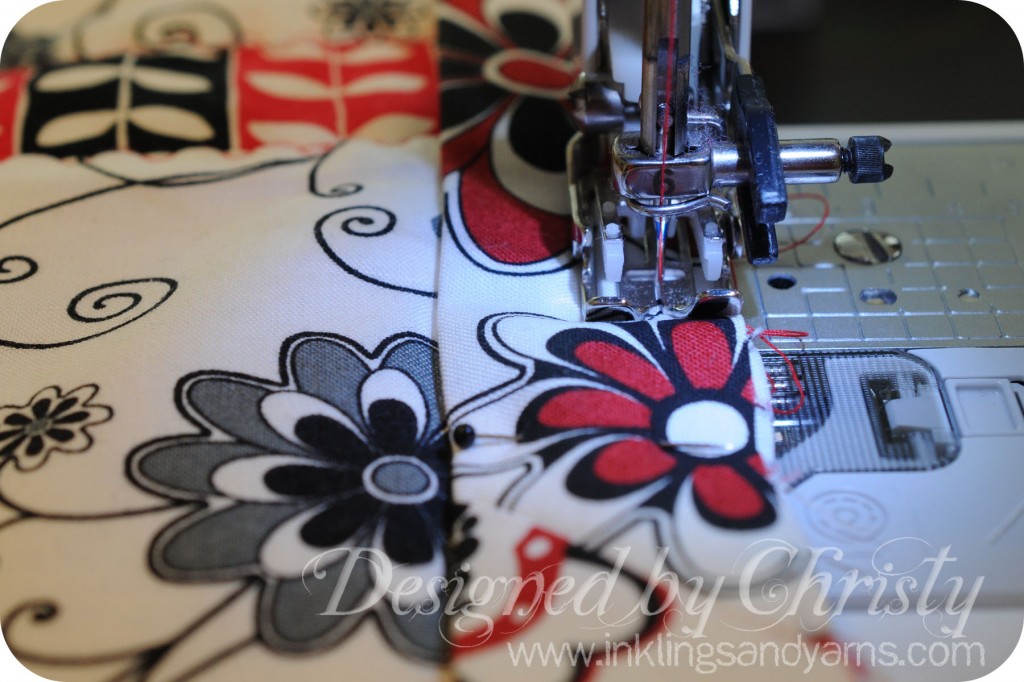
Yaaaay!
I hope you found this tutorial useful. If you like it, please do me a favor and pin it :o)


Comments 54
ثبت شغل
Heya i’m for the primary time here. I came across this board and
I find It truly useful & it helped me out much. I am hoping to give one thing back and aid
others like you helped me.
It’s perfect time to make some plans for the future and it is time to be happy.
I have read this post and if I could I wish to suggest you few
interesting things or tips. Maybe you could
write next articles referring to this article.
I wish to read even more things about it!
Thanks for finally talking about > Quilt Binding Tutorial:
Finishing Ends | Inklings & Yarns < Liked it!
Hi, i read your blog from time to time and i own a similar
one and i was just wondering if you get a lot of spam comments?
If so how do you protect against it, any plugin or anything you can suggest?
I get so much lately it’s driving me crazy so any assistance is very much appreciated.
Hello there! This post could not be written much better!
Looking through this post reminds me of my previous roommate!
He always kept preaching about this. I’ll send this article to him.
Fairly certain he’s going to have a great read. I appreciate
you for sharing!
magnificent issues altogether, you just won a new
reader. What may you recommend in regards to your submit
that you made a few days ago? Any sure?
It’s a pity you don’t have a donate button! I’d most certainly donate
to this excellent blog! I guess for now i’ll settle for bookmarking and
adding your RSS feed to my Google account. I look forward
to brand new updates and will talk about this blog with my
Facebook group. Talk soon!
After exploring a handful of the blog articles on your
web site, I honestly appreciate your way of
blogging. I bookmarked it to my bookmark website list and will be checking back in the near future.
Please check out my website as well and let me know your opinion.
Spot on with this write-up, I actually believe that this website needs a great deal more attention. I’ll probably
be back again to read more, thanks for the info!
Howdy! I could have sworn I’ve been to this blog before but after browsing
through some of the post I realized it’s new
to me. Anyhow, I’m definitely glad I found it
and I’ll be bookmarking and checking back often!
Hey very nice blog!
Hello there! I know this is kinda off topic however I’d figured I’d ask.
Would you be interested in trading links or maybe guest writing a
blog post or vice-versa? My website goes over a lot of the same topics as yours and I feel
we could greatly benefit from each other. If
you might be interested feel free to shoot me an e-mail.
I look forward to hearing from you! Fantastic blog by the way!
What i do not understood is in truth how you are not really much more well-preferred than you might
be right now. You are very intelligent. You understand therefore considerably relating to this matter, made
me personally believe it from so many numerous angles.
Its like women and men don’t seem to be interested unless it is something to
do with Girl gaga! Your personal stuffs nice.
All the time handle it up!
Quality articles is the crucial to attract the viewers to
visit the site, that’s what this web site is providing.
یو پی اس
I am extremely impressed with your writing skills as well as with the layout on your blog.
Is this a paid theme or did you modify it
yourself? Anyway keep up the excellent quality writing, it’s rare to
see a great blog like this one nowadays.
I used to be able to find good info from your articles.
Wow that was odd. I just wrote an extremely long comment but after
I clicked submit my comment didn’t appear. Grrrr…
well I’m not writing all that over again. Regardless, just
wanted to say fantastic blog!
I have been exploring for a bit for any high quality articles or blog posts on this kind of house
. Exploring in Yahoo I at last stumbled upon this website.
Studying this info So i’m glad to convey that I have a very
just right uncanny feeling I discovered exactly what I needed.
I so much undoubtedly will make certain to do not disregard
this website and provides it a glance regularly.
Hmm it seems like your site ate my first comment (it was super long) so I guess I’ll
just sum it up what I submitted and say, I’m thoroughly enjoying your blog.
I too am an aspiring blog blogger but I’m still new to everything.
Do you have any recommendations for rookie blog writers?
I’d really appreciate it.
hey there and thank you for your info – I’ve definitely picked up
something new from right here. I did however expertise a few technical points using this site, since I experienced to reload the website many times previous to I could get it to
load properly. I had been wondering if your web host is OK?
Not that I’m complaining, but sluggish loading instances times will
often affect your placement in google and can damage your high
quality score if ads and marketing with Adwords.
Anyway I am adding this RSS to my e-mail and can look out for a lot more of your
respective intriguing content. Ensure that you update this again soon.
What’s up to all, the contents existing at this web site are genuinely amazing for people experience, well, keep up the good
work fellows.
I do not even know how I ended up here, but I thought this post was good.
I don’t know who you are but definitely you’re going to a famous blogger if
you aren’t already ;) Cheers!
Thanks a lot for sharing this with all of us you actually understand what you are speaking
approximately! Bookmarked. Kindly additionally seek advice
from my web site =). We may have a hyperlink trade agreement between us
It’s fantastic that you are getting ideas from this paragraph as well as from our argument made at this
time.
First off I would like to say great blog! I had a quick question which
I’d like to ask if you do not mind. I was interested to
find out how you center yourself and clear your head prior to writing.
I’ve had trouble clearing my mind in getting my ideas out there.
I truly do enjoy writing however it just seems like the first 10 to 15 minutes tend to be wasted
simply just trying to figure out how to begin. Any suggestions or tips?
Thanks!
First off I want to say superb blog! I had a quick question that I’d like to ask if you do not mind.
I was curious to find out how you center yourself and clear your mind prior to writing.
I have had a hard time clearing my thoughts in getting my ideas
out. I do enjoy writing however it just seems like the first 10 to
15 minutes are usually wasted simply just trying to figure out how
to begin. Any ideas or tips? Appreciate it!
For most recent information you have to visit world-wide-web and on world-wide-web I found this site as a best site
for newest updates.
Its such as you learn my thoughts! You appear to grasp a lot about
this, like you wrote the guide in it or something.
I feel that you simply could do with some percent to pressure the message
house a little bit, but other than that, this is great blog.
A fantastic read. I’ll definitely be back.
Woah! I’m really digging the template/theme of this blog.
It’s simple, yet effective. A lot of times it’s
very hard to get that “perfect balance” between usability and visual
appearance. I must say that you’ve done a great job with
this. Also, the blog loads very quick for me on Chrome.
Outstanding Blog!
I feel that is one of the so much vital info for me. And i am glad studying your article.
But should statement on few common things, The website taste
is perfect, the articles is actually excellent : D.
Excellent process, cheers
Nice blog! Is your theme custom made or did you download it from somewhere?
A theme like yours with a few simple adjustements would really
make my blog stand out. Please let me know where you got your design. Thanks
You made some good points there. I looked on the web for additional information about the issue and found most people will
go along with your views on this site.
Hi all, here every one is sharing these knowledge, so it’s
nice to read this website, and I used to go to see this web site daily.
Superb site you have here but I was curious about if you knew of any discussion boards that cover the same topics talked about here?
I’d really like to be a part of online community where I can get feed-back from other knowledgeable individuals that share the same interest.
If you have any recommendations, please let me know.
Thank you!
I was suggested this website by my cousin. I’m not sure whether this post
is written by him as no one else know such detailed about my problem.
You are incredible! Thanks!
My developer is trying to persuade me to move to .net from PHP.
I have always disliked the idea because of the costs.
But he’s tryiong none the less. I’ve been using WordPress
on numerous websites for about a year and am nervous about
switching to another platform. I have heard excellent things about blogengine.net.
Is there a way I can import all my wordpress content into it?
Any help would be greatly appreciated!
What’s up, I would like to subscribe for
this web site to take most recent updates, so where can i do it please assist.
I have been browsing online more than 2 hours today, yet I never found any interesting
article like yours. It’s pretty worth enough for me.
In my opinion, if all website owners and bloggers made good content as you did,
the web will be much more useful than ever before.
This piece of writing gives clear idea in support of the new users of blogging,
that really how to do blogging and site-building.
My partner and I stumbled over here different page and thought I should check things
out. I like what I see so i am just following you. Look forward to looking at your web page repeatedly.
Hmm it seems like your site ate my first comment (it was
extremely long) so I guess I’ll just sum it up what I submitted and say, I’m thoroughly enjoying your blog.
I too am an aspiring blog writer but I’m still new to everything.
Do you have any recommendations for rookie blog writers?
I’d definitely appreciate it.
I love it when folks come together and share opinions.
Great blog, keep it up!
There’s definately a great deal to find out about this topic.
I love all the points you made.
When some one searches for his vital thing,
therefore he/she needs to be available that in detail, thus that
thing is maintained over here.
Highly energetic blog, I liked that a lot. Will there be a part
2?
What’s up everybody, here every one is sharing these kinds of experience, therefore it’s good
to read this weblog, and I used to visit this blog every day.
No matter if some one searches for his vital thing, thus
he/she needs to be available that in detail, therefore that thing
is maintained over here.
Thank you for the auspicious writeup. It in fact was a amusement
account it. Look advanced to far added agreeable from you!
By the way, how could we communicate?
Pretty great post. I just stumbled upon your blog and wished to say
that I’ve truly loved surfing around your blog posts.
In any case I’ll be subscribing in your feed and I hope you write once more soon!
Thank you for sharing your thoughts. I really appreciate your efforts and I will
be waiting for your further write ups thank you once again.
My brother recommended I might like this website.
He was once entirely right. This post actually made my day.
You cann’t believe simply how much time I had spent for this information!
Thanks!
I am truly delighted to read this blog posts which carries plenty of
helpful information, thanks for providing these kinds of statistics.