Keeping to the theme of Advent Calendars of All Shapes and Sizes, today I’m sharing a super-creative decoration designed by my mom (with my help). As often happens, she called me several weeks ago and said “I have a great idea.” What this usually means is “I need a 20-page scrapbook by early next week,” or in this case “I need 36 fabric Christmas ornaments by December 1st.” So. Fortunately for both of us, when my mom has big ideas, I usually have a way (read: the supplies necessary) to scale it down to something manageable. When she started talking about (36!!) miniature quilts in different Christmas shapes, my answer was an immediate “no.” I did, however, come up with a no-sew solution that worked perfectly. But don’t take my word for it. Take it away, Mom:
This project has been in progress for almost a year, and I am delighted that Christy invited me as a guest blogger (or, maybe I invited myself…whatever).
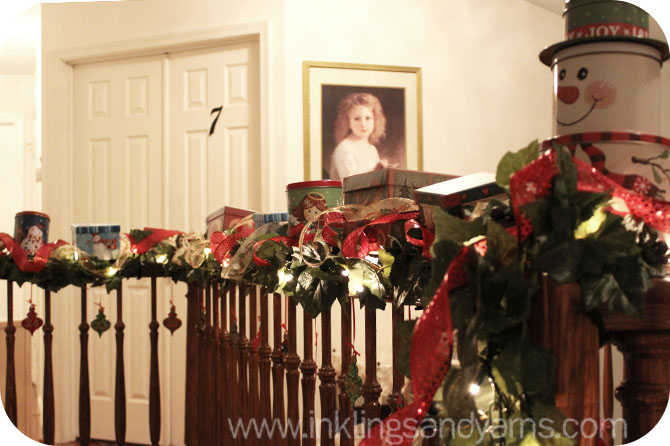
Last January, when it was time to take down the Christmas decorations, I was eagerly awaiting the arrival of my first grandbaby, Rita Alexandra, and thinking ahead to how much fun Christmas would be this year. I love having the house decorated for Christmas, and especially put a lot of time into decorating the hall banister. Usually, I tend toward a more elegant look, but it occurred to me that I wanted to do something whimsical to celebrate Rita’s first Christmas.
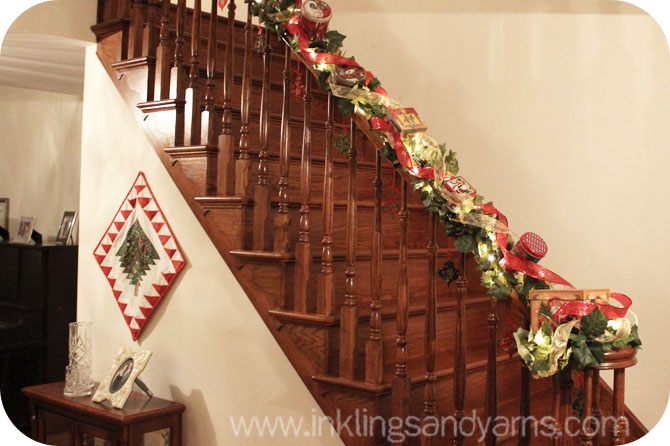
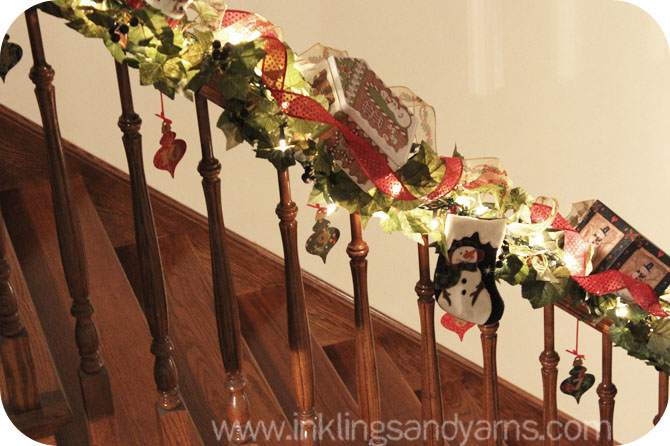
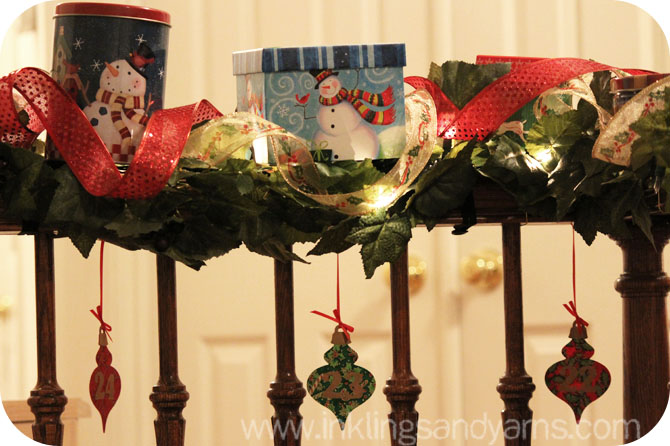
My other favorite Christmas decoration, which will come as no surprise to those who follow this blog, is the Advent calendar. So I decided to combine the two. I collected Christmas boxes and tins in a variety of sizes and shapes, punched holes in the bottoms, and tied them with elastic cording to strands of lighted ivy garland.
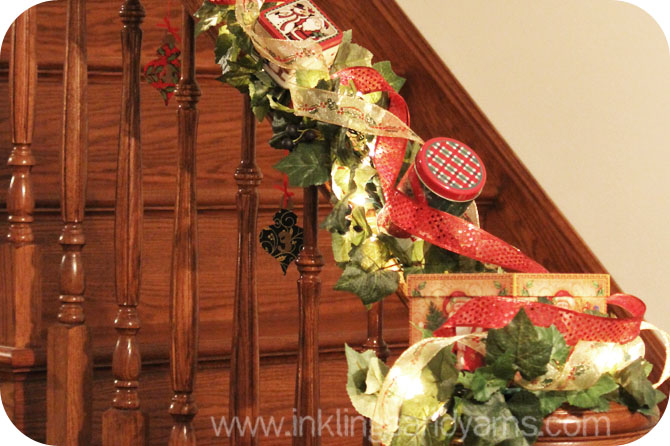
I then threaded ribbon through the garland and around the boxes to finish the look. The front banister, going up the stairs and along the balcony, holds 24 boxes and tins for Advent. The back banister counts the 12 days of Christmas, so we can continue the celebration through the Epiphany.
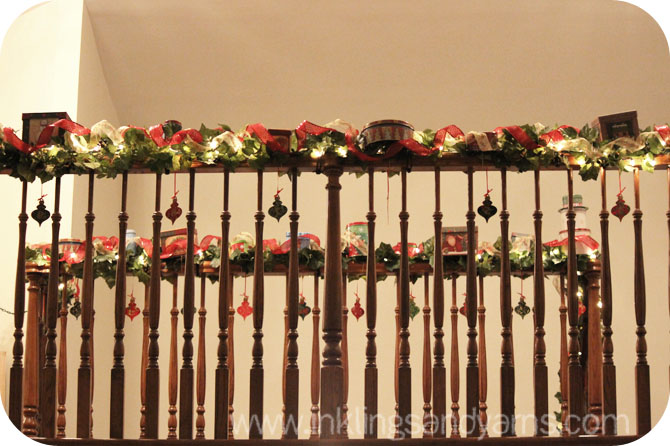
Of course, I needed a way to label each box with the number of the day it should be opened. I originally made baked cinnamon ornaments in heart, star and tree shapes to serve this purpose, but was not happy with the result. While visiting Christy in November, she came up with the idea of die cutting ornaments and numbers from fabric and using Steam-A-Seam to iron them together.
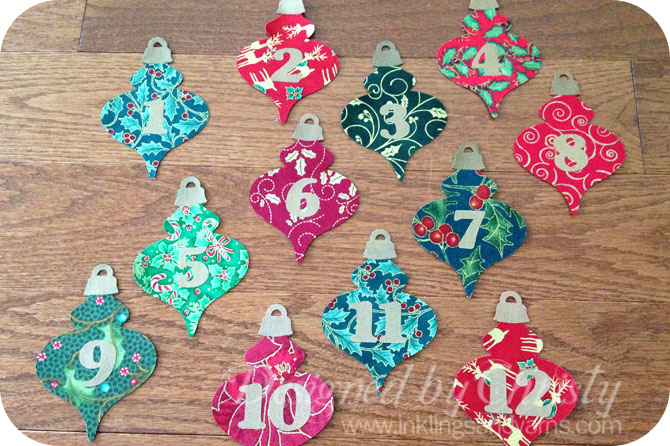
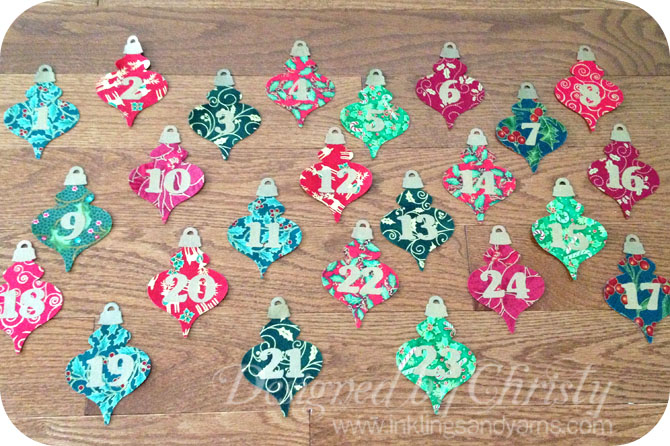
Of course, we’d spent the whole week quilting, and didn’t come up with this plan until the last night of our trip. So once I’d gone home, Christy made a trip to the fabric store where she sent me pictures of various fabrics. I chose the ones I wanted, and she put the ornaments together and mailed them to me. They are beautiful.
Sadly, Rita will not be here for the entire month of December, so other lucky visitors may have the opportunity to open a gift. It could be you! But, don’t worry, little baby, Grandmommy knows you will be here on December 22, 23, and 24…
A few notes from Christy about the ornaments: We wanted them to be double-sided, so I used Steam-A-Seam to fuse the fabrics together before I die cut them. The ornament die is from Sizzix. Their thick dies (Originals and Bigz) cut through fabric flawlessly. To cut the numbers I used my Pazzles. I ironed the Steam-A-Seam to one side of the fabric, then placed it fabric-side-down on the cutting mat. Since I was cutting from the back, I reversed the text image so the numbers cut backwards. Then all my mom had to do was choose which numbers to put on which ornaments, peel away the Steam-A-Seam backing paper, and iron on. I also used some extra gold fabric to cut the ornament tops, just to finish off the look.


Comments 31
Attractive component of content. I just stumbled upon your web site and in accession capital to assert that I get in fact loved account your weblog posts. Anyway I’ll be subscribing in your feeds or even I fulfillment you get entry to constantly rapidly.
I appreciate the valuable information in your articles. I’ve bookmarked your blog and will visit regularly. I’m confident I’ll continue learning a lot from your content. Best wishes for your future endeavors!
I truly appreciate the valuable information in your articles. I’ve bookmarked your blog and plan to visit regularly. I’m confident I’ll continue learning a great deal from your content. Wishing you all the best in your future endeavors!
I genuinely value the information in your articles. I’ve bookmarked your blog and plan to visit regularly. I’m confident that I’ll continue to gain valuable knowledge from your content. Wishing you much success in your future endeavors!
I greatly appreciate the valuable information in your articles. I’ve bookmarked your blog and plan to visit regularly. I’m confident I’ll continue gaining a wealth of knowledge from your content. Wishing you all the best in your future endeavors!
I truly value the information in your articles. I’ve bookmarked your blog and plan to visit regularly. I’m confident I’ll continue to gain a wealth of knowledge from your content. Wishing you great success in your future endeavors!
I thoroughly enjoyed reading it and even shared it with a friend who was researching the same topic. He found it so valuable that he treated me to lunch as a token of appreciation! Thank you once again for your efforts.
Your approach to content creation is outstanding, and this article has been incredibly helpful in addressing my challenges.
We are a group of volunteers launching a new initiative in our community, and your website has been an indispensable resource. Your contributions are truly remarkable, and our entire community is immensely grateful for your work.
It was such a pleasure to read that I shared it with a friend who was exploring the same topic. He appreciated it so much that he treated me to lunch as a thank-you! So, I wanted to express my gratitude once again.
I enjoyed reading it so much that I shared it with a friend who was exploring the same topic. He found it so valuable that he treated me to lunch as a thank-you! So, I wanted to express my gratitude once again.
Hey! Do you know if they make any plugins to assist with SEO? I’m trying to get my blog to rank for some targeted keywords but I’m not seeing very good gains. If you know of any please share. Thanks!
I think other web-site proprietors should take this web site as an model, very clean and excellent user genial style and design, as well as the content. You are an expert in this topic!
Thank you for another wonderful post. Where else could anyone get that kind of information in such an ideal way of writing? I have a presentation next week, and I am on the look for such information.
Definitely, what a magnificent blog and educative posts, I surely will bookmark your site.Have an awsome day!
That is the precise weblog for anybody who desires to seek out out about this topic. You realize a lot its nearly hard to argue with you (not that I actually would need…HaHa). You definitely put a new spin on a subject thats been written about for years. Great stuff, just nice!
Pretty section of content. I just stumbled upon your weblog and in accession capital to assert that I get actually enjoyed account your blog posts. Anyway I’ll be subscribing to your augment and even I achievement you access consistently fast.
whoah this blog is fantastic i love reading your articles. Keep up the great work! You know, a lot of people are hunting around for this info, you can aid them greatly.
Hey there, You have done a great job. I will certainly digg it and individually suggest to my friends. I’m confident they’ll be benefited from this site.
Thanks a lot for sharing this with all people you actually know what you are talking about! Bookmarked. Kindly additionally discuss with my site =). We may have a link exchange agreement among us!
This piece struck a chord with me on a personal level. It’s like you read my mind!
I love how you break down complex concepts into simple and understandable parts.
I’m impressed, I must say. Actually rarely do I encounter a blog that’s both educative and entertaining, and let me tell you, you will have hit the nail on the head. Your idea is outstanding; the difficulty is something that not sufficient persons are speaking intelligently about. I am very comfortable that I stumbled throughout this in my search for one thing referring to this.
I like what you guys are up too. Such clever work and reporting! Carry on the excellent works guys I’ve incorporated you guys to my blogroll. I think it will improve the value of my web site :)
Great work! This is the type of information that should be shared around the web. Shame on the search engines for not positioning this post higher! Come on over and visit my website . Thanks =)
Hello there! Would you mind if I share your blog with my zynga group? There’s a lot of people that I think would really appreciate your content. Please let me know. Cheers
Unquestionably believe that which you stated. Your favorite reason seemed to be on the net the easiest thing to be aware of. I say to you, I certainly get irked while people think about worries that they plainly do not know about. You managed to hit the nail upon the top as well as defined out the whole thing without having side-effects , people can take a signal. Will probably be back to get more. Thanks
Hi there, just became aware of your blog through Google, and found that it’s truly informative. I am going to watch out for brussels. I’ll be grateful if you continue this in future. A lot of people will be benefited from your writing. Cheers!
Thanks a lot for giving everyone such a wonderful opportunity to read critical reviews from this blog. It really is very good and also packed with fun for me and my office colleagues to visit your site on the least 3 times in 7 days to study the latest issues you have got. And definitely, I’m just actually astounded concerning the dazzling opinions you serve. Certain 2 facts in this posting are absolutely the finest I’ve ever had.
I’m very happy to read this. This is the type of manual that needs to be given and not the random misinformation that’s at the other blogs. Appreciate your sharing this greatest doc.
Excellent read, I just passed this onto a colleague who was doing some research on that. And he actually bought me lunch because I found it for him smile So let me rephrase that: Thank you for lunch!