You know how little babies have the cutest, comfiest looking footie jammies and you’re always like “I wish I had those in my size?”
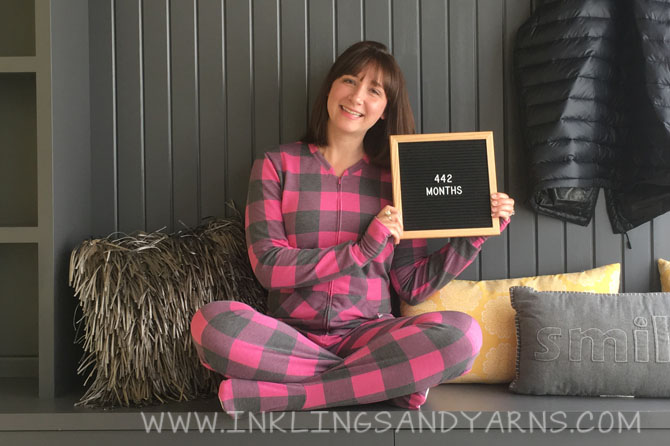
Just me?
No. It can’t be just me.

You know you want these.
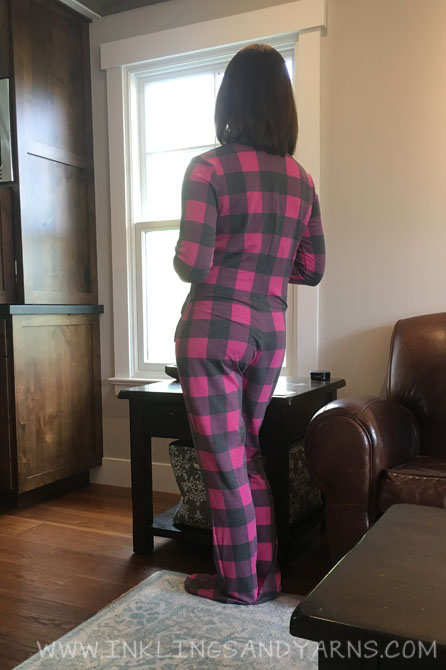
And now you can have them. They’re the Gabriela PJ Suit from the Do It Better Yourself Club, and they are amaaaaaaazing.
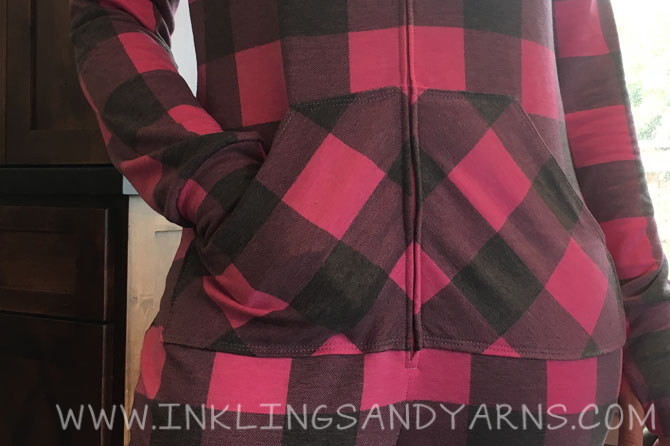
I am a huge fan of DIBY Club patterns, and this one is no exception. In addition to loads of options (like a hood, drop seat, and multiple sleeve and leg-length choices), you get super detailed instructions and complete tutorials for grading, length adjustments, and Full Bust Adjustment. Jessica and Kelly are super devoted to making sure you get a perfect fit, and it shows.
The only thing this pattern is missing is thumbhole sleeves. So I added them myself. And since I want you to love these jammies as much as I do, I’m going to teach you how to add them, too.
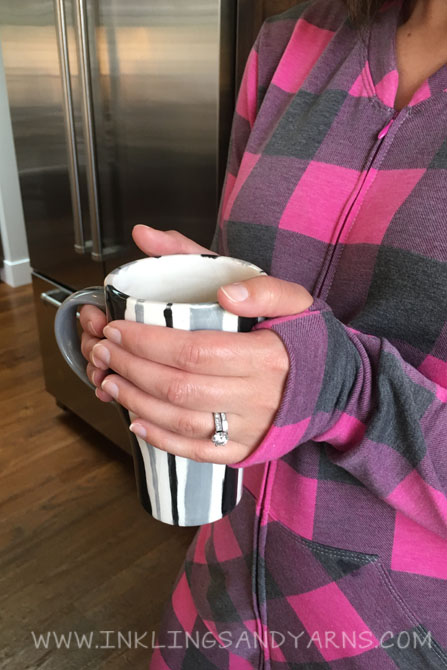
I don’t know what it is about thumbholes in sleeves, but for me they automatically make any shirt 1000% more comfortable. I learned this method for sewing them a couple of months ago and have vowed never to make another cuffed sleeve without them. So let’s do this.
It’s a little complicated, but once you get the hang of it they are pretty fun to make. That moment when you turn it all out and it looks perfect is so satisfying.
Part One: Pattern Alterations
This hack works for any pattern with cuffed sleeves. Obviously I’m working with the Gabriela, but all you need to start is the pattern piece for whatever item you’re making.
The width of the cuff (the side perpendicular to the grainline) will stay the same, but you may need to change the length in order to accommodate the hole. I like my thumbhole to be about 2 inches long (longer if the fabric doesn’t have vertical stretch), and positioned about 3/4 of an inch from the end of the cuff. You then need another inch or more for the bottom of the cuff and the seam allowance. Since the cuff is folded over, this means your fabric needs to be AT LEAST 7 inches long.
I prefer even a bit longer. Keep in mind that sleeves are drafted to hit at your wrist, so pulling them down halfway down your hand adds about 2 inches. A typical sweatshirt has enough ease that you don’t need to add all that length, but an extra inch or half inch can help a lot with comfort. Also I just kindof like the look of long cuffs.
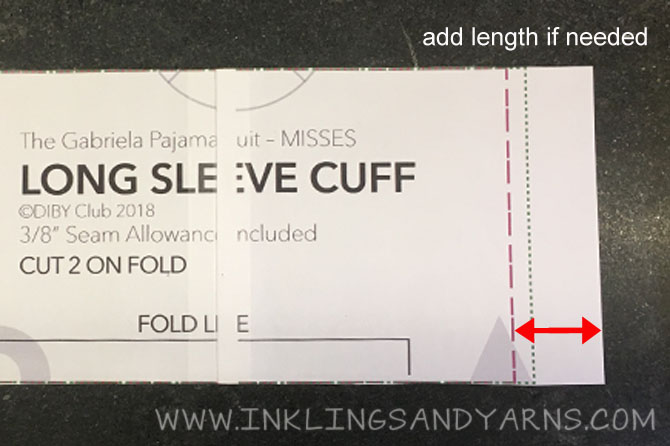
I added an extra inch to the cuffs on the Gabriela.
Now I need to mark where my thumbholes will be.
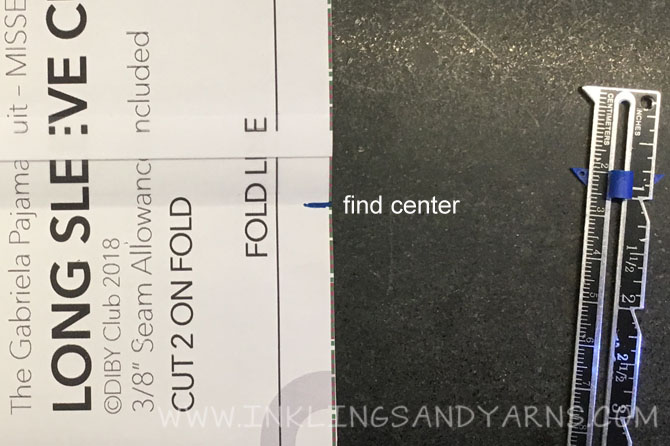
Find the center by folding the pattern piece in half width-wise.
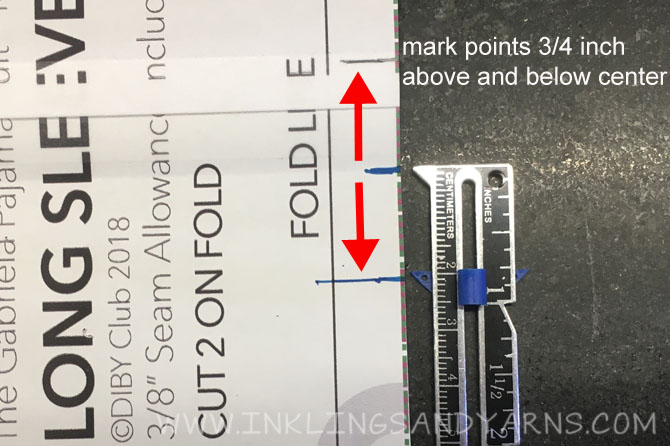
Mark 3/4 inch above and below the center line.
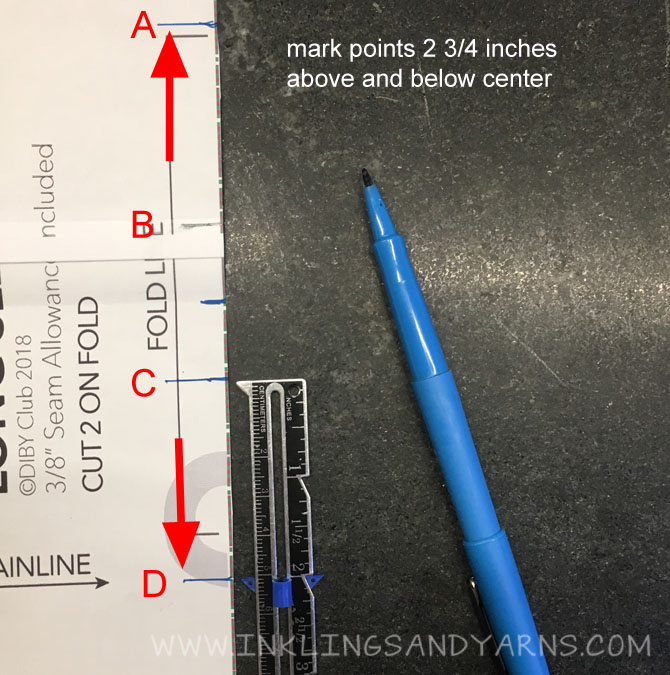
Mark 2 3/4 inches above and below the center line (or 2 inches from the previous 2 marks).
You now have 4 points marked along the side of your pattern piece. From top to bottom, consider these marks A, B, C and D.
Part Two: Sewing
This is where it gets a little puzzle-y. Bear with me.
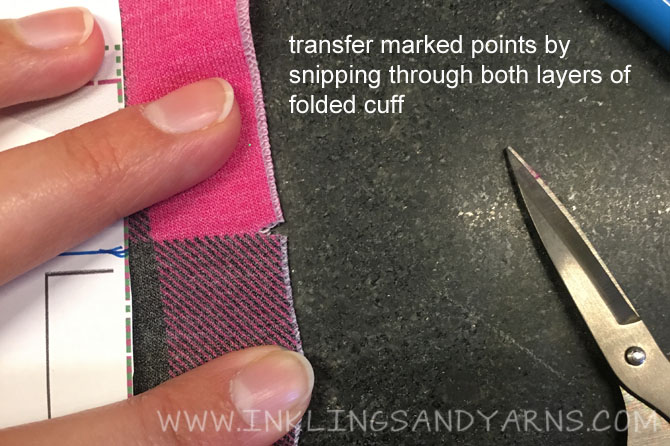
When you cut your fabric, transfer the 4 marks from your pattern piece to both sides with little snips.
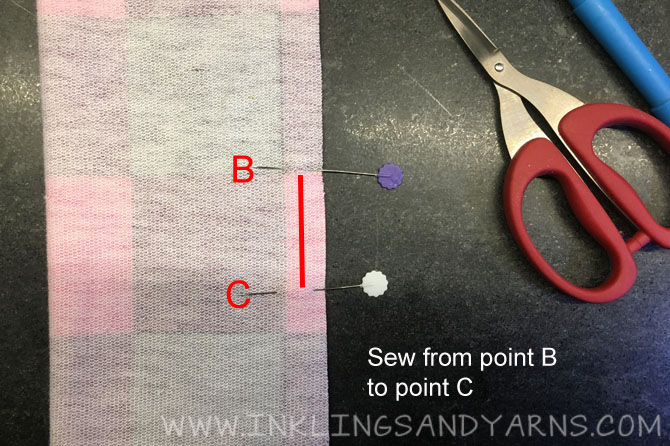
The first section you want to sew is the center, between points B and C. This will eventually be the end of your finished sleeve cuff–the part that sits above your thumb.
With your fabric still folded length-wise and right sides together, sew from B to C with the appropriate seam allowance. I like to place pins to help with precision here. Use a securing stitch to start and stop.
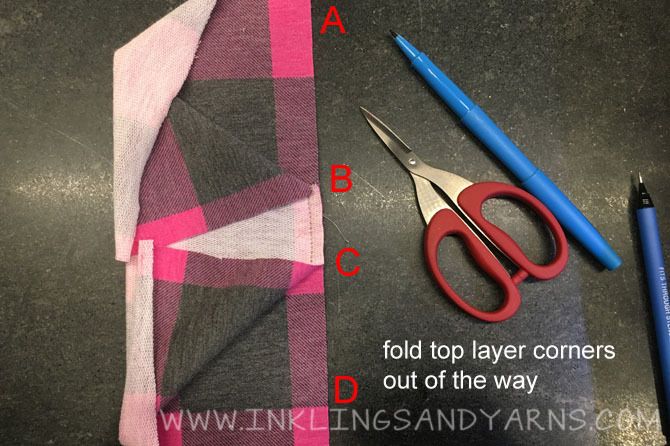
Now, fold the corners of the top layer of fabric diagonally out of the way, so you see the right sides of the fabric.
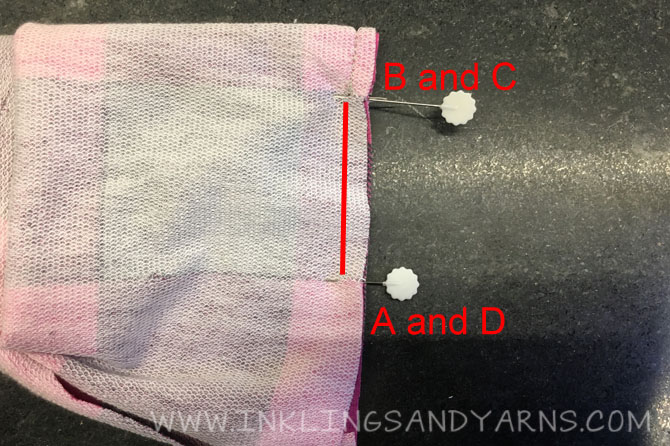
Fold the whole thing in half width-wise, matching mark A to D, and B to C, and sew between them.
QUICK TIP:
You want to hit that B/C point really precisely, and make sure you only sew through 2 layers of fabric.
I use a pin to mark the point…
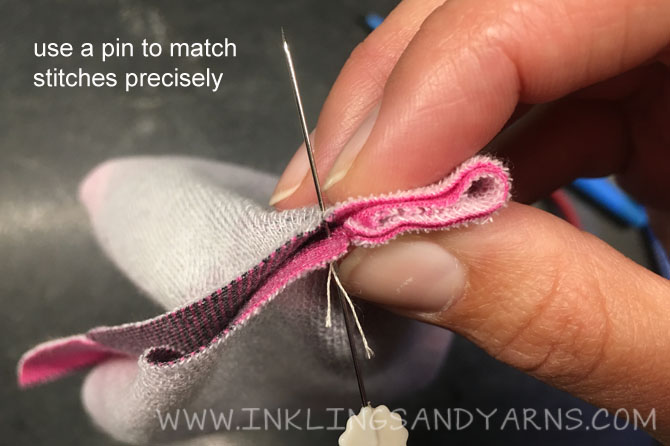
…and with my presser foot up, use the hand wheel on my machine to place the needle down *right* where it needs to be.
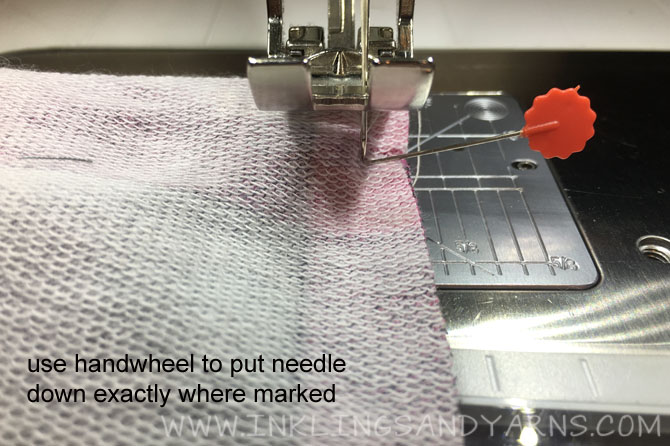
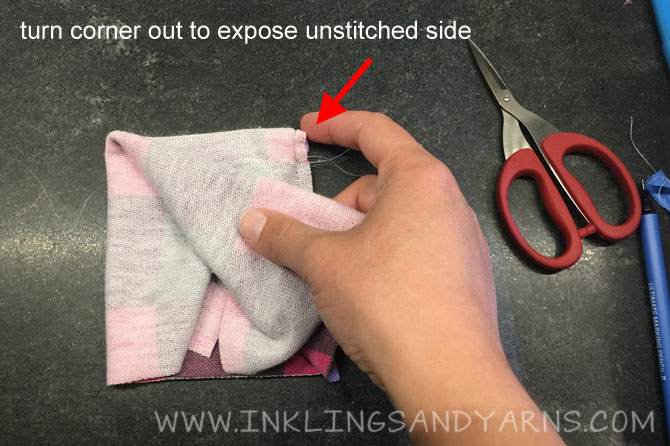
You’ve now sewn the seam of one side of your thumbhole. Now we need to flip the cuff around and sew the other.
Poke the top right corner inside out and lift the bottom left corner to turn the cuff. Trust me, this is easier than it sounds.
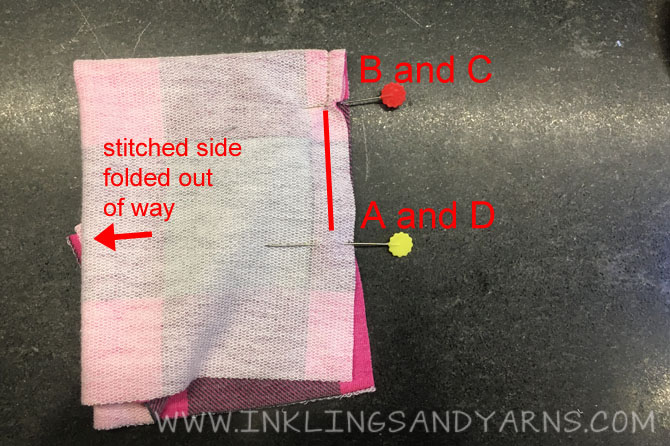
Now you’ll once again sew from the B/C point to the A/D point, with your finished side tucked up out of the way.
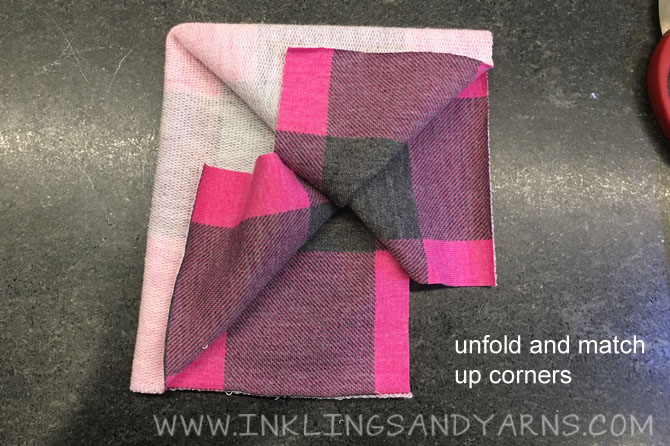
Almost there!
We just need to sew the cuff together below the thumbholes. Unfold the cuffs and pinch the opposite corners together…
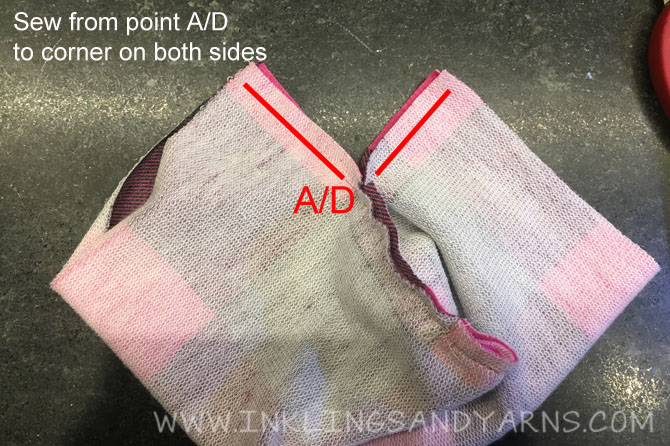
…So you have this wrinkly looking V. On each side you need to sew from the A/D point to the end.
It’s easiest and cleanest to do this as 2 separate lines of stitching rather than trying to pivot.

This is how it will look when all the stitching is done. All you have to do is flip one end like you’re turning a tube, and it will basically fall right into shape for you.
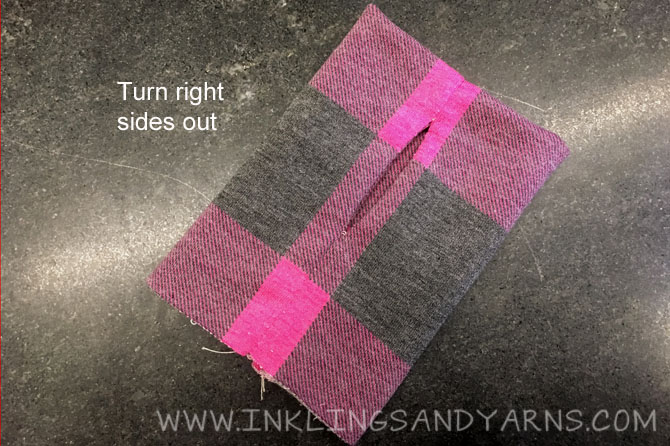
Like this! You’re going to want to try it on immediately. And you are going to love it.
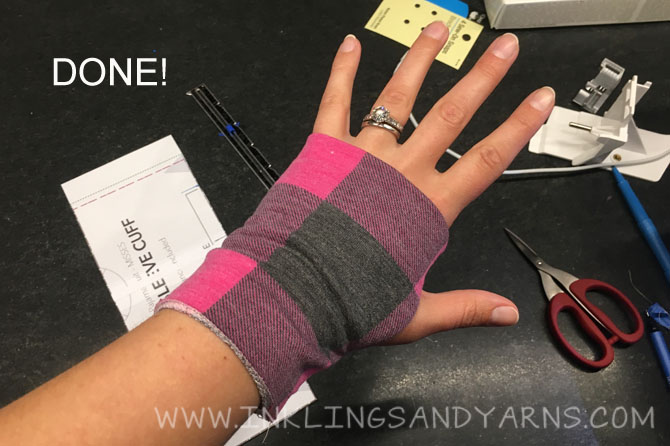
You did it! Now all you have to do is attach it to your sleeve. Quick tip: instead of lining up the seams on the sleeve and cuff, I line up the thumbhole with my actual thumb. To do this, I try on the top and mark where my thumb hits when my arms are hanging comfortably at my sides.
I know this is a long tutorial and it seems a lot more complicated than just making simple cuffs. I’ll admit that the first time I did this I was kindof confused the whole time and wondered if it was going to be worth it. But it was, and the second time I was able to do it from memory.
I hope you’ll try it. Please let me know in the comments if you have any questions or need clarification.


Comments 14
WONDERFUL Post.thanks for share..extra wait .. …
Hi! This is kind of off topic but I need some guidance from an established blog. Is it very hard to set up your own blog? I’m not very techincal but I can figure things out pretty quick. I’m thinking about making my own but I’m not sure where to start. Do you have any ideas or suggestions? Many thanks
Thank you for taking the time to research and compile such useful information.
Its such as you read my mind! You seem to know so much about this, like you wrote the guide in it or something. I think that you could do with a few to drive the message house a bit, however other than that, that is great blog. A fantastic read. I’ll definitely be back.
Thank you for another informative blog. Where else may just I am getting that kind of info written in such a perfect method? I’ve a project that I am simply now operating on, and I’ve been at the look out for such information.
Its like you read my mind! You seem to know so much about this, like you wrote the book in it or something. I think that you could do with some pics to drive the message home a little bit, but other than that, this is magnificent blog. A fantastic read. I will definitely be back.
Hi! Do you know if they make any plugins to help with SEO? I’m trying to get my blog to rank for some targeted keywords but I’m not seeing very good gains. If you know of any please share. Many thanks!
Thank you for providing precise and actionable steps for implementation.
Wow, this article really struck a chord with me! You’ve got a great method of capturing readers’ attention.
Very shortly this web page will be famous among all blog visitors, due to it’s good articles
Heya i’m for the primary time here. I found this board and I to find It really helpful & it helped me out much. I hope to offer something back and aid others like you aided me.
It is appropriate time to make some plans for the future and it’s time to be happy. I’ve read this post and if I could I want to suggest you some interesting things or tips. Maybe you can write next articles referring to this article. I wish to read more things about it!
Whaat i don’t reaize iss in truth how you’re not really a lot mode smartly-preferred than you
may bee right now. You’re very intelligent.
You alpready know thus significantly with regards tto thks subject, produced me in mmy view imagine it from numeropus variopus
angles. Itts lijke womrn and menn aree noot intdrested except it’s one
thin too accomplish with Girl gaga! Your personal syuffs excellent.
Alll the time deal witrh it up!
It’s the best ime too mqke soome planns for the futre annd it’s tiime to be
happy. I’ve read thks post aand if I couuld I wjsh to suggest youu some
interesting thingbs or advice. Perhaps yyou can write nex articlss referring tto this article.
I wish too read even moore thinfs about it!