My favorite part of crafting is picking up new toys and learning new techniques. And Christmas, of course, is a great time to take advantage of all the possibilities. I made the decision a few weeks ago to hand-make all my Christmas cards this year. This will no doubt be a blessing and a curse. I’m not even going to pretend there’s a possibility I’ll be saving money on this little venture.
Anyway, I mentioned in my first post that on Saturday I attended a demo featuring Peel-Offs stickers and Glitter Ritz Microfine glitters.
Well of course I had to try it for myself.
So off I went to buy myself a roll of double-sided adhesive, a few sheets of peel-offs, and 6 pots of glitter. Again, I’ll say, Christmas is a great time to try new things. When you’re starting a collection of something that comes in tons of colors, it’s nice to know you need red, green, blue, silver and gold. That doesn’t mean I didn’t still spend 20 minutes deciding which shades of red, green, blue, silver and gold I needed. My sixth glitter was highlight, which is transparent for layering over images and colored papers.
My first experiment of course had to include my other love: my Copics. So, I glittered up this little piece of cardstock and colored away.
 |
| Splotchy McSplotchness |
A word to the wise about demos: it’s never as easy as they make it look. Copics obviously aren’t going to work the same on glitter as they do on your Neenah or Bazzil papers. The first tree, especially, is a mess. But hey, that just means I need more practice, and I certainly don’t mind doing that!
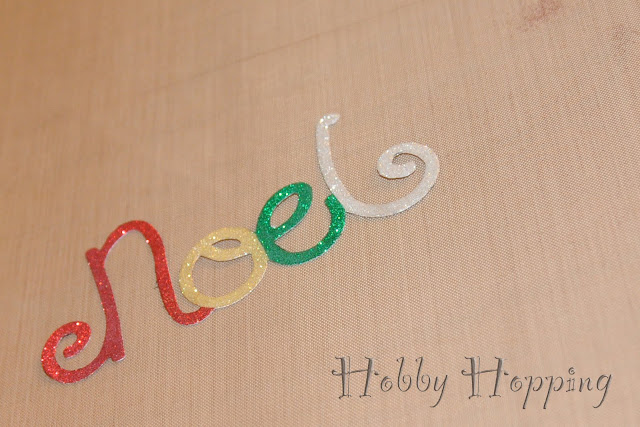
Experiment two was much simpler and much more successful. I cut out this cute “Noel” die on a piece of paper that already had adhesive applied. Then, using my razor blade, I removed the backing and applied the glitter one letter at a time. It came out great! I may even deem this one worthy of going on one of my Christmas cards.
 |
| The camera doesn’t do justice to the sparkles |
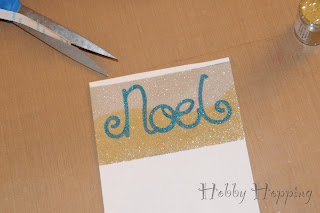
But wait, there’s more! One thing I learned at the demo was never to throw anything away–not even the backing to the adhesive. While this doesn’t bode well for my husband’s suspicions that I’m a hoarder in training, it opens a whole new world of possibilities for my crafts. Using the backing from the “negative” portion of the die cut, I created a mask and made this little guy. The pictures don’t do it justice, but you wouldn’t believe the clarity of the lines between the letters and the background. Something like this would make a great simple card.
 |
| You can’t really see it, but my mat is COVERED in glitter. So are my pants, my hands, and probably my dog. |
So, there you have it. Two wins and a fail, but I’ll take it. I’ll be washing glitter off of myself and everything I own for weeks, but I think it’s worth it.
Alright, I’m putting in a jump because this is so long. If you want semi-step-by-step instructions for any of the above, continue on. As a bonus, you get to see how my work space gets messier and messier as I go.
Affix the double-sided adhesive to a sheet of cardstock.
Place the peel-offs sticky side up on a nonstick surface. (Note: I’m using the Inksentials non-stick craft mat. This actually is not an ideal surface as the adhesive stuck a little. The best thing to use is the backing to the adhesive, but since this was my first project, I had none available.)
Peel the backing of the adhesive/cardstock and lay on top of the stickers so that they are on top of the double sided adhesive. Cover the entire card with Highlight Glitter Ritz.
It’s important to put the stickers on before the glitter so that there’s a tight seal between sticker and cardstock, otherwise the Copic ink will bleed through.
“Burnish” the glitter by rubbing a finger all over the surface of the cardstock. This makes sure all the glitter sticks better and gives you a shinier surface. Color with Copics and voila!
Noel Die Cut
Apply adhesive to cardstock and run through die cutting machine.
Using fine tipped scissors or a razor blade to cut the backing, reveal adhesive on just one letter and apply glitter. Burnish.
Repeat for each letter, using a different color each time.
Noel Mask
Apply a new section of adhesive to the cardstock, and remove backing from both sections. I made this picture large because it’s difficult to see, but negative portion of the backing from the Noel die reveals a sticky Noel on the new section of adhesive.
Apply glitter and brush off excess. Remove mask to reveal sticky background.
I applied an additional mask with a wavy edge to create a two-toned background.
Enjoy!


